

Bluebeam Cloud is the market-leading suite of cloud-based solutions seamlessly connecting with your documents and toolsets in Revu. With Bluebeam Cloud, you can work and collaborate with your AEC teams from anywhere via Web or iOS devices. All you need is an internet connection with no installation required. It allows you to:
- Quickly access your tool sets and Studio Project files from Revu.
- Invite team members to annotate drawings and collaborate in real-time.
- Seamlessly manage punch, RFIs, and submittals using Field Tools.
Let’s explore the fundamentals of Bluebeam Cloud to get started with.
Bluebeam Cloud - Sign In
Step 1 – Navigate to Bluebeam Cloud. 
Step 2 – At the top right corner, choose your server region and click “Sign In.”
Step 3 – In the sign-in portal, enter your Bluebeam ID (BBID) and click “Next.”
Step 4 – In the next session, enter your password and click the “Sign In” button.
Once you are signed in, you’ll see the My Workspace and Projects tabs on the left panel of the window to navigate to My Workspace and Projects.
Bluebeam Cloud > “My Workspace”
My Workspace is your private dashboard where you can upload and mark up drawings exclusive of a shared project.
Navigating My Workspace
Once you sign in to Bluebeam Cloud, it will automatically lead you to My Workspace.
Step 1 – To upload PDFs, you can browse or drag-&-drop your files (It currently supports PDFs only). 
Step 2 – Once uploaded, you can see, open, edit, rename, or delete your files privately until they are ready to share. 
Step 3 – After uploading a drawing to your workspace, double-click on the drawing to open it.
You can now annotate drawings, access markups, and add comments to your PDF.
Step 4 – To go back, click on the back arrow (<) at the top left corner of the window.
Deleting or Renaming Files in My Workspace
Right-click on the file thumbnail in the main window > select either option.
- Right-click > Rename.
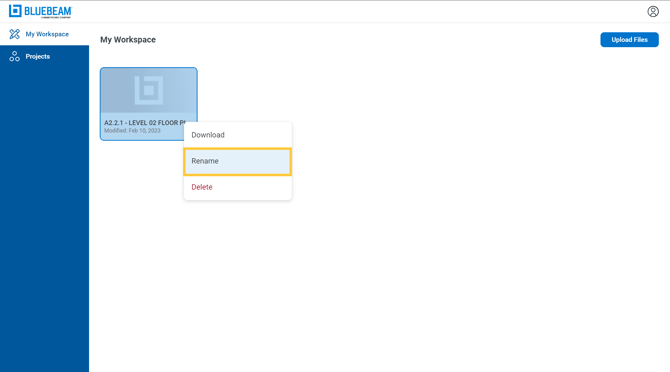
Update file name > Click “Rename.” 
Your file name will be updated.
- Right-click > Delete.
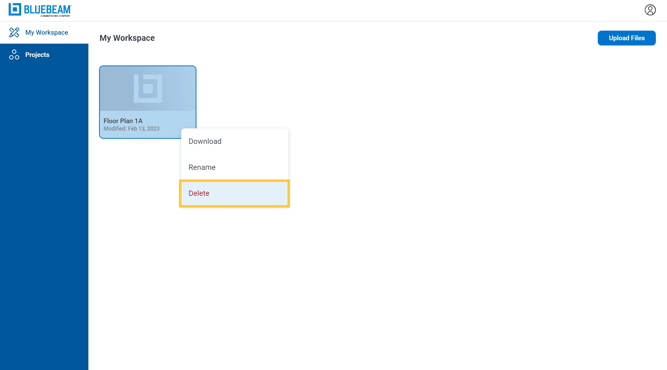
Your file will be deleted.
Note: If you have a Read-only account or Viewer permissions, you won’t be able to upload drawings to My Workspace. However, you can be invited to collaborate on Projects. Once your subscription plan or trial expires, your account automatically switches to read-only mode.
In read-only mode, you can only open and view drawings already uploaded on My Workspace but cannot annotate them. To use all features of Workspace, you need a Basics, Core, or Complete subscription and Member or Admin permissions.
To restore your subscription or request a new subscription plan for Bluebeam Revu 21, connect with Brighter Graphics, the leading Bluebeam Reseller & Bluebeam Sapphire partner.
Bluebeam Cloud > “Projects”
To create a project in Bluebeam cloud and collaborate on your PDF drawings in real-time:
Step 1 – Select Projectsfrom the left panel to access or create shared projects.
Step 2 – You can open existing projects or create a new project by clicking on the “New Project” button at the top right corner.
Step 3 – In the pop-up window, enter a new project name and click “Create.”
Your new project will be created as follows:
Step 4 – To access the project, click on the project name. Once the project is opened for the first time, a session will ask you to complete your profile. Add the required information and click “Confirm.”
Step 5 – After opening the project profile, you can:
- Add Location
- Invite team to members & define their access roles.
- Upload drawings
- Create Punch Items
- Create RFIs

To go back to My Workspace:
Step 1 – Click or tap the Bluebeam logo in the upper left corner of the window.
Step 2 – Click or tap on the user icon at the top-left corner > Click “Logout” from the drop-down menu to sign out of the session.


