

Consider a scenario where you're working on a complex architectural drawing with a tight deadline looming, and you need to measure the area of multiple shapes with irregular dimensions and open boundaries. You know you could spend hours carefully selecting every point and curve of the shape to create a markup. That's where Dynamic Fill in Bluebeam Revu 21 comes in to save your time and effort.
Dynamic Fill in Revu 21 is a powerful feature that allows you to select even the most irregular areas of your drawings and instantly convert them into polygons, spaces, or other measurement markups with just a few clicks. It's like having a magic wand that lets you quickly and easily markup irregular drawings, streamlining your workflow and saving you valuable time.
But how does it work? Simply create a boundary around the area or section you want to measure, then fill in the selection with Dynamic Fill. From there, you can choose the type of markup you want to create, whether it's an area, volume, or perimeter measurement and apply dynamic full to complete the measurement.
This step-by-step guide will help you discover how to use Dynamic Fill in Revu 21. Let's discuss this in detail.
To use Dynamic Fill in Bluebeam Revu 21:
Step 1 – In the menu bar go to “Tools” > Hover your cursor over the “Measure” option > Select “Dynamic Fill.”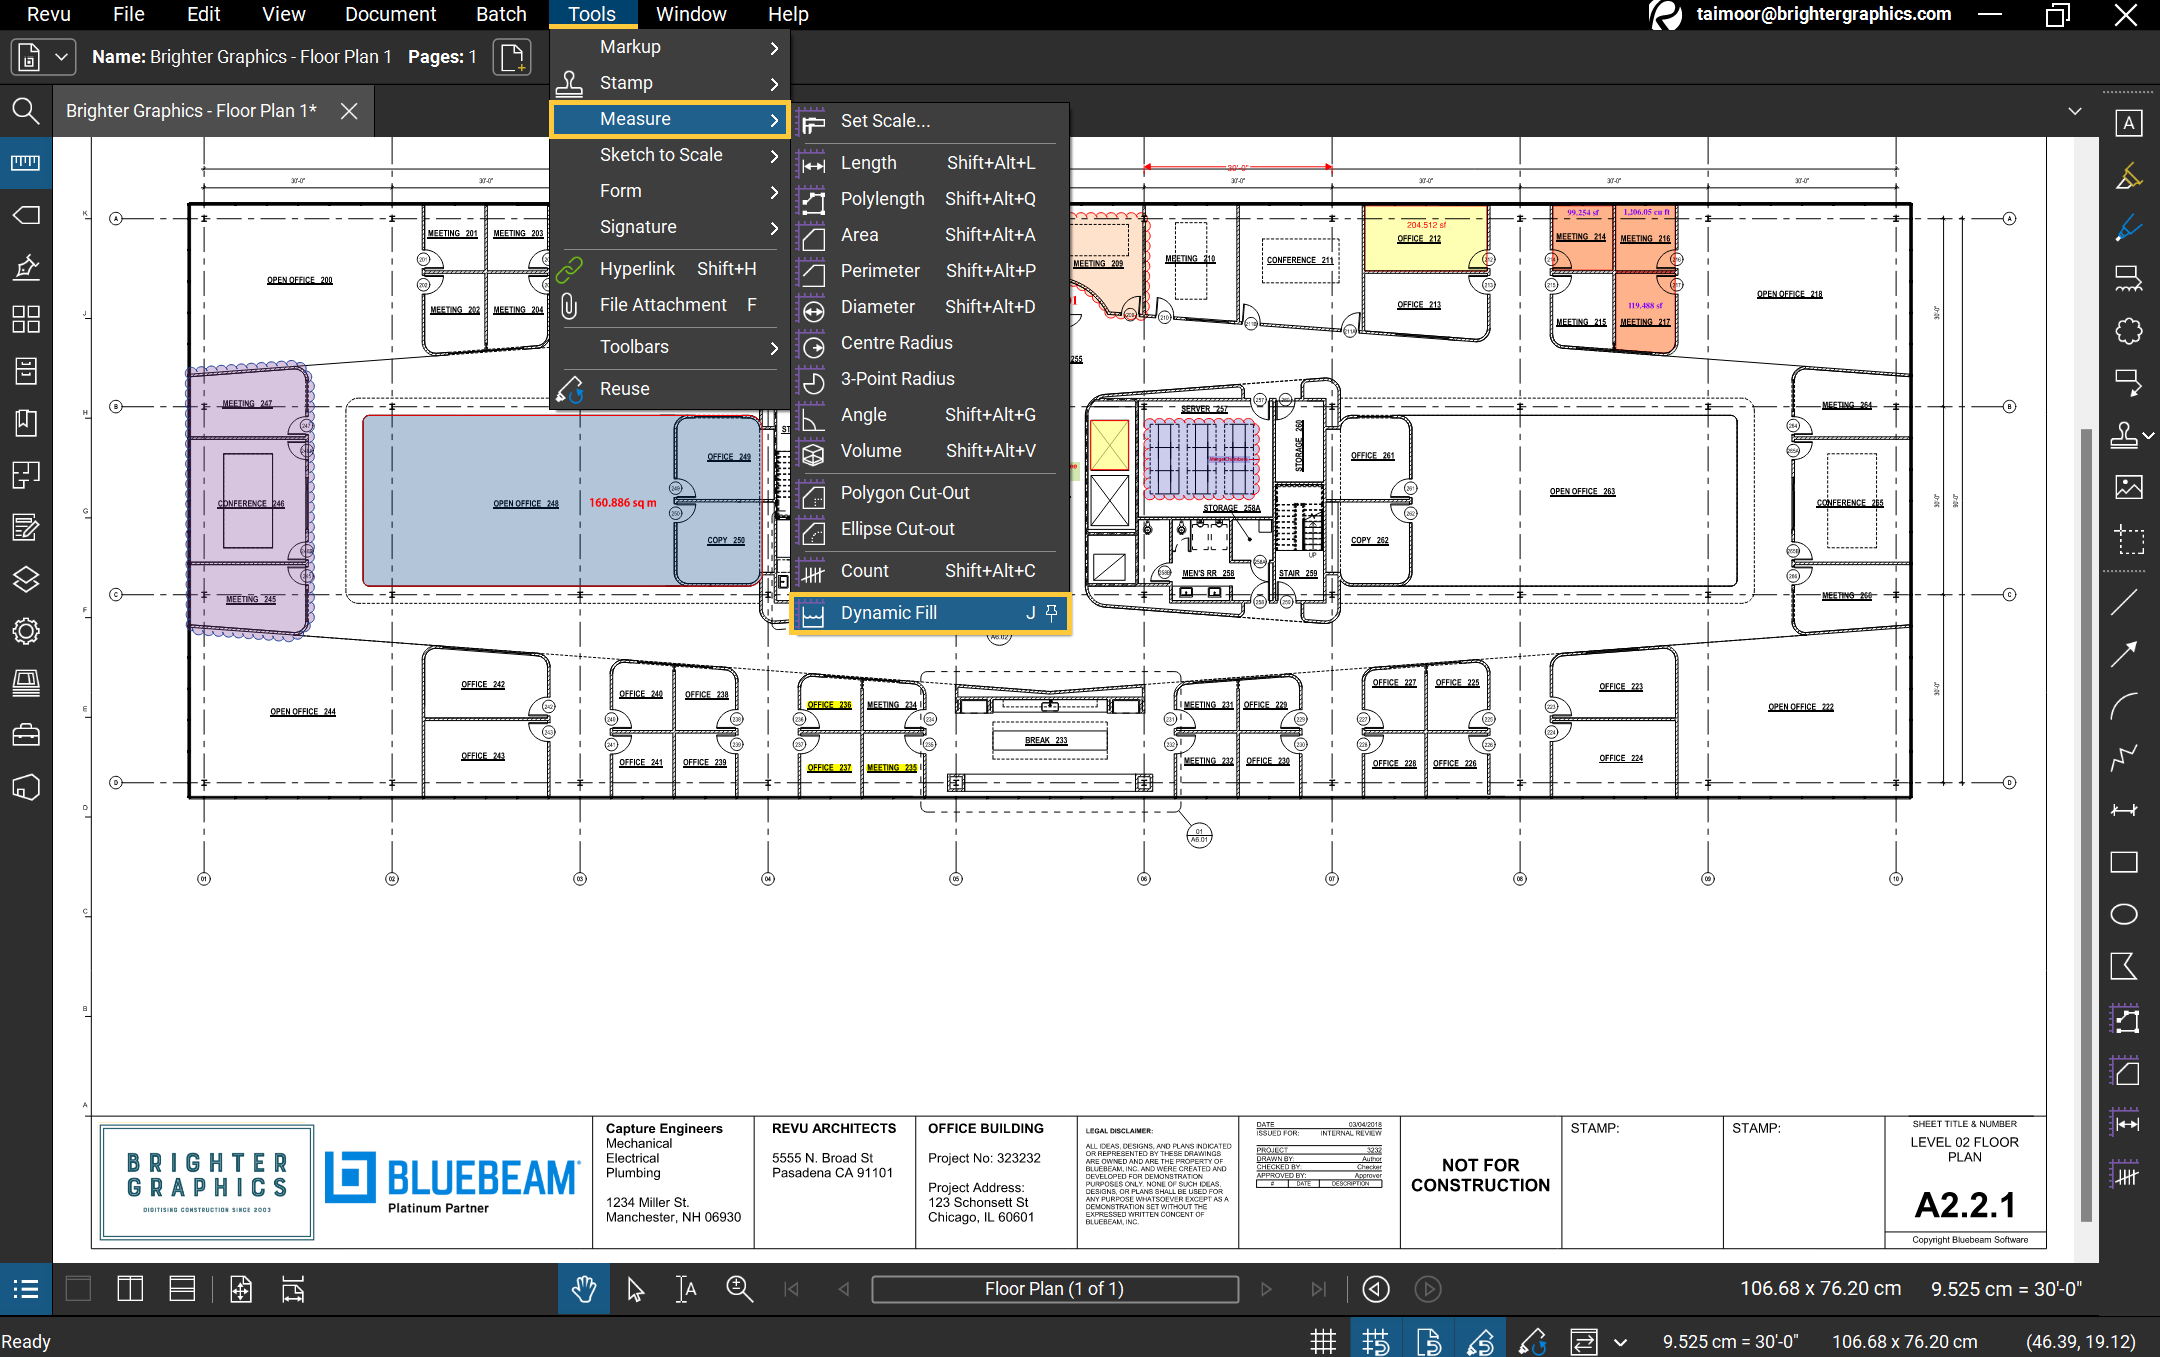
A floating toolbar will appear like the one below. It allows you to access the available tools, settings, and markups that you can use to manipulate your Dynamic Fill.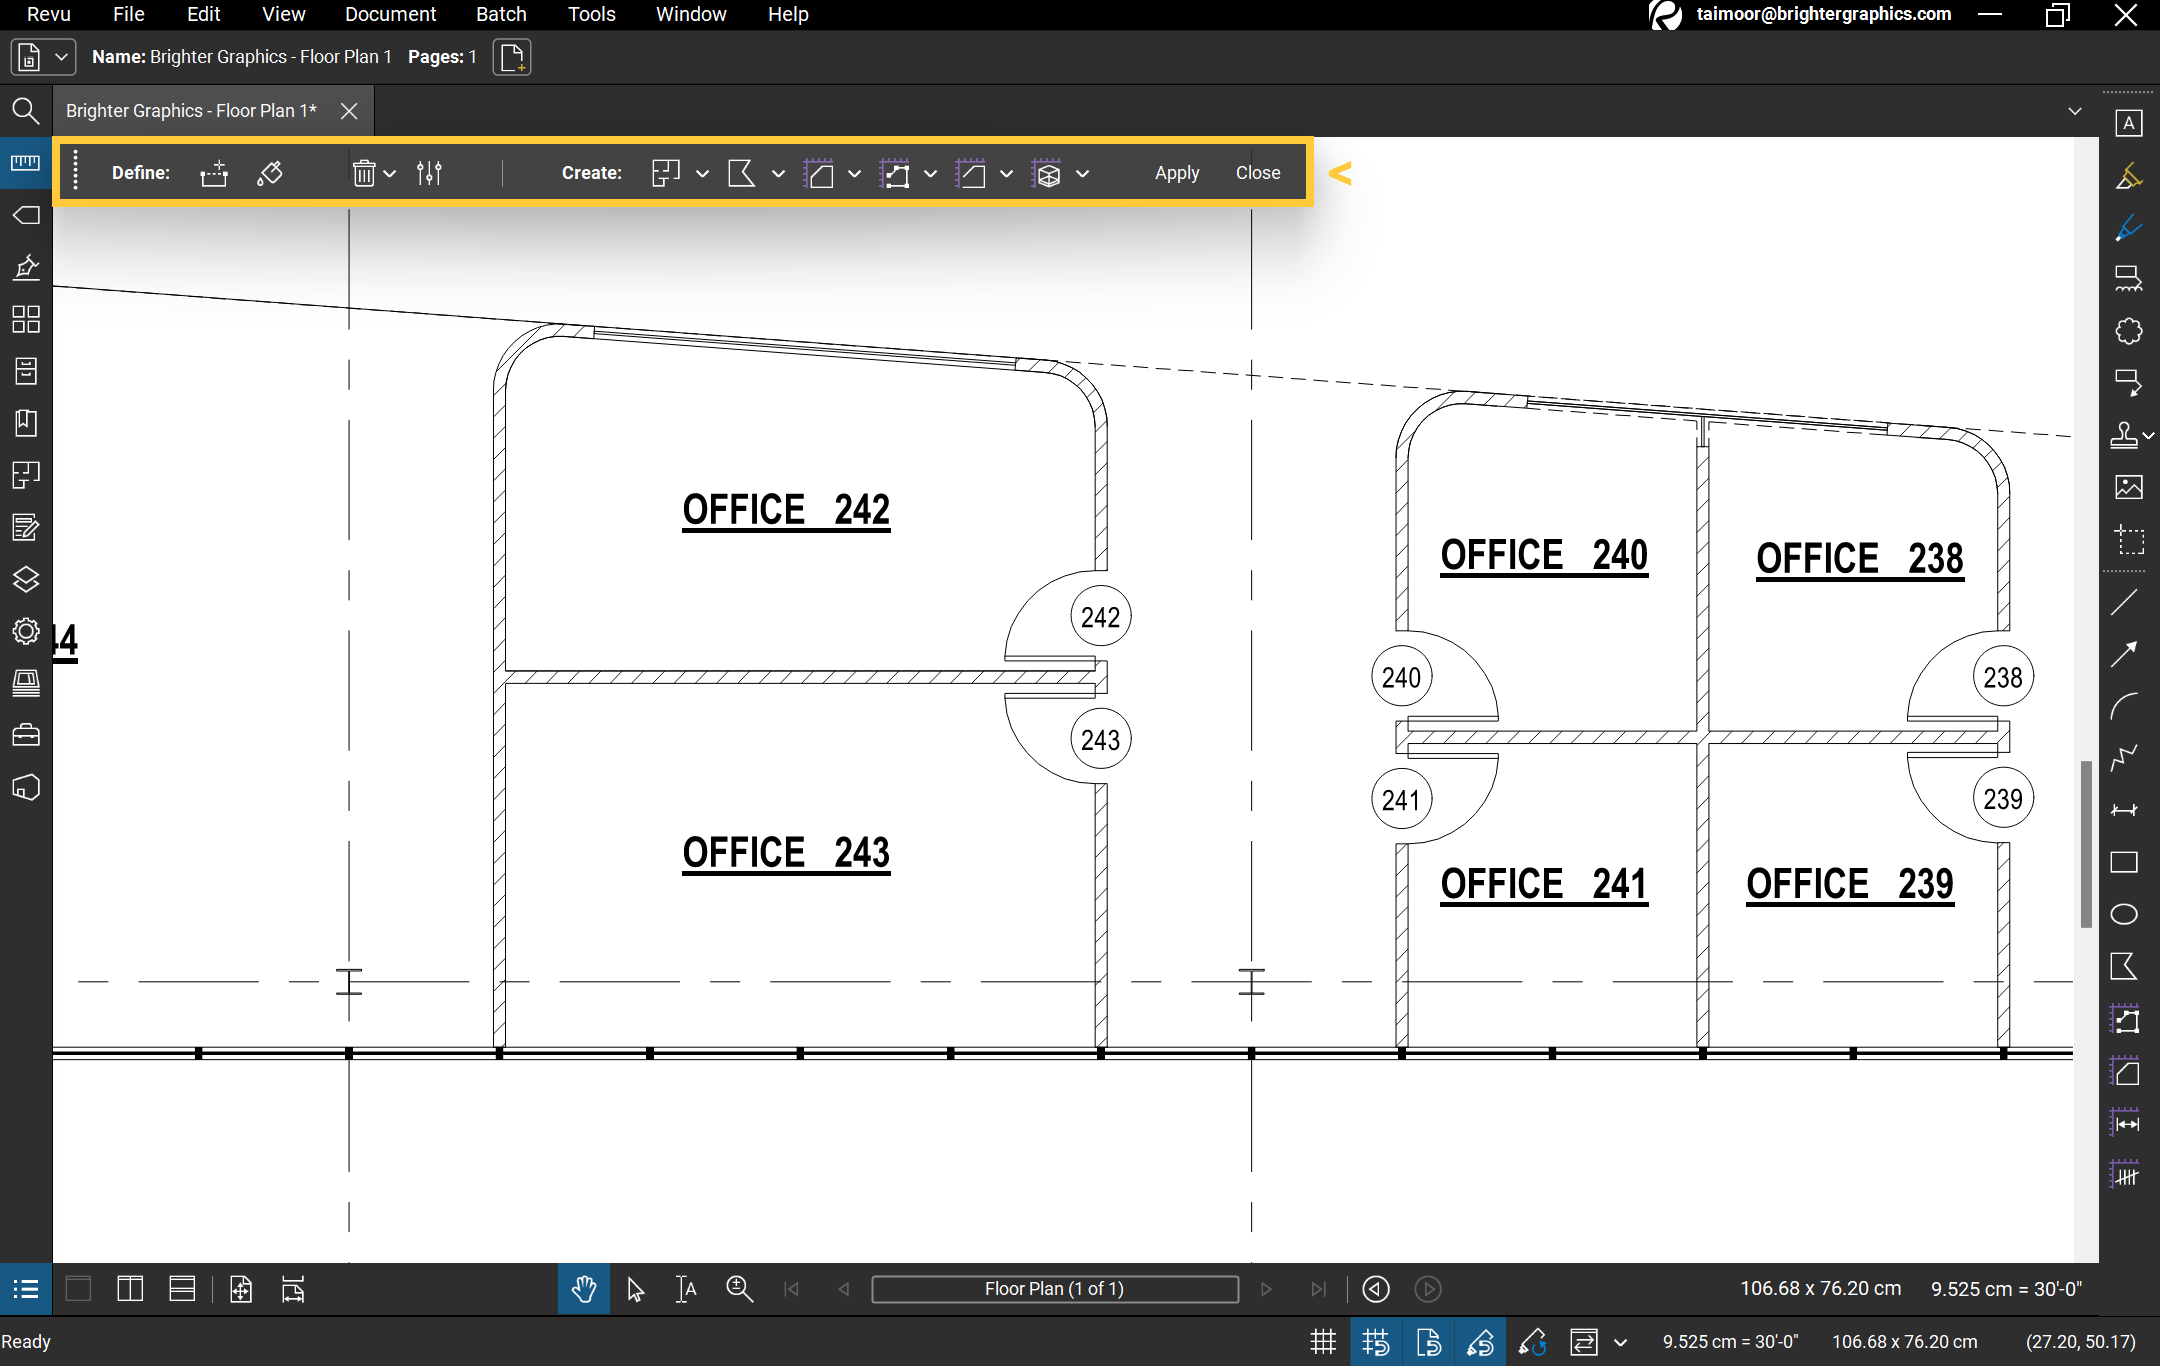
Step 2 – Click on the “Settings” icon to edit the properties of your Dynamic Fill.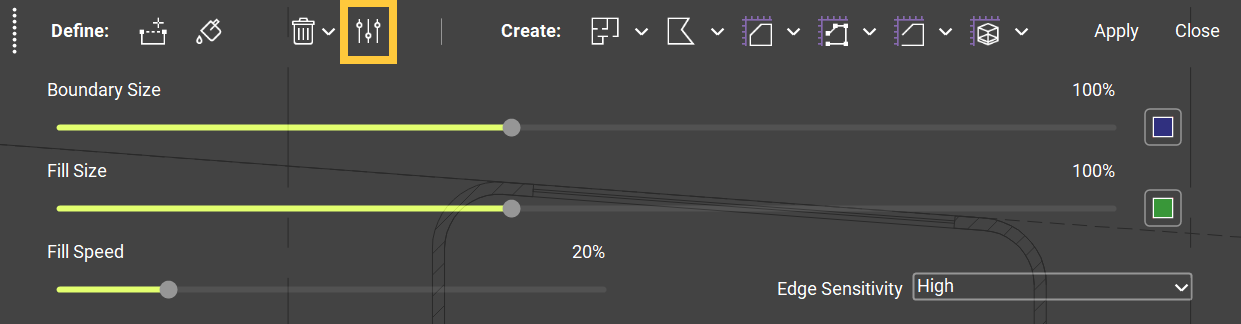
From Settings, you can change the
- Boundary Size – To change the boundary thickness as much as you want.
- Fill Size – To set the size or diameter of your Fill tool.
- Fill Speed – Set how fast the fill spreads.
- Fill Colour – Set your fill colour from the small square at the right side of the Fill Size slider bar.
- Boundary Colour – The colour of your boundary selection.
- Edge Sensitivity – It tells the fill where to stop spreading at open selections (be at the thin lines or the thinker ones).
Consider a scenario where you find an area of your drawing portion having open ends like the one below.
Step 3 – Select the “Boundary” tool > Make a selection > Double-click at the finish end to apply the boundary.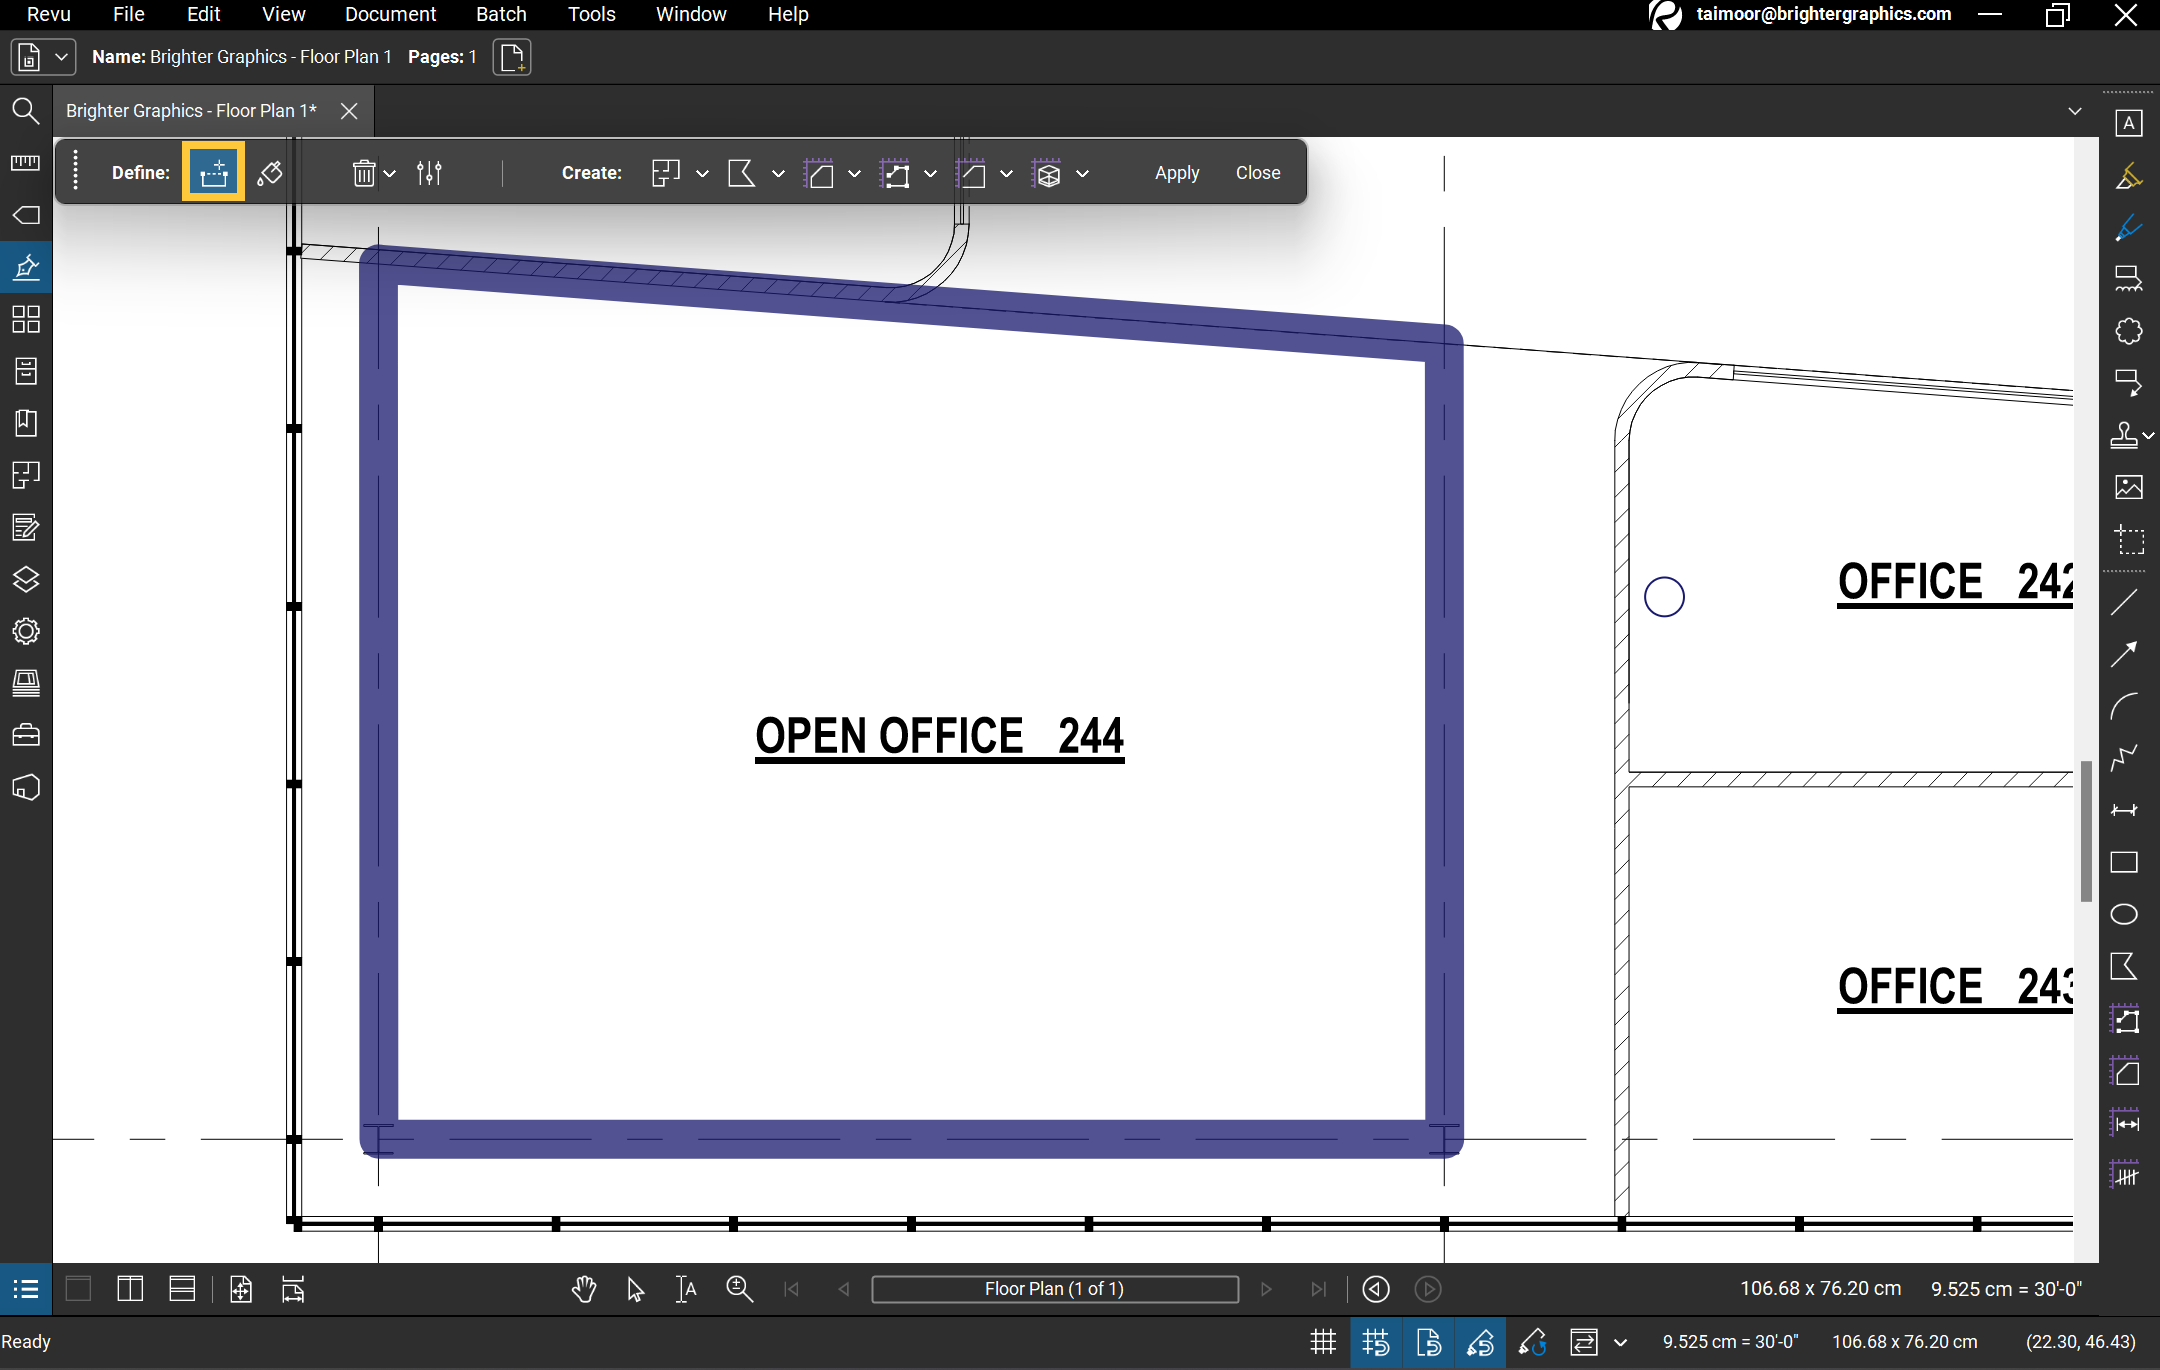
Note: You can either apply individual anchor points to draw a polygon or click-drag-&-release to make a rectangular selection.
Step 4 - Select the “Fill” tool to fill in the selected area.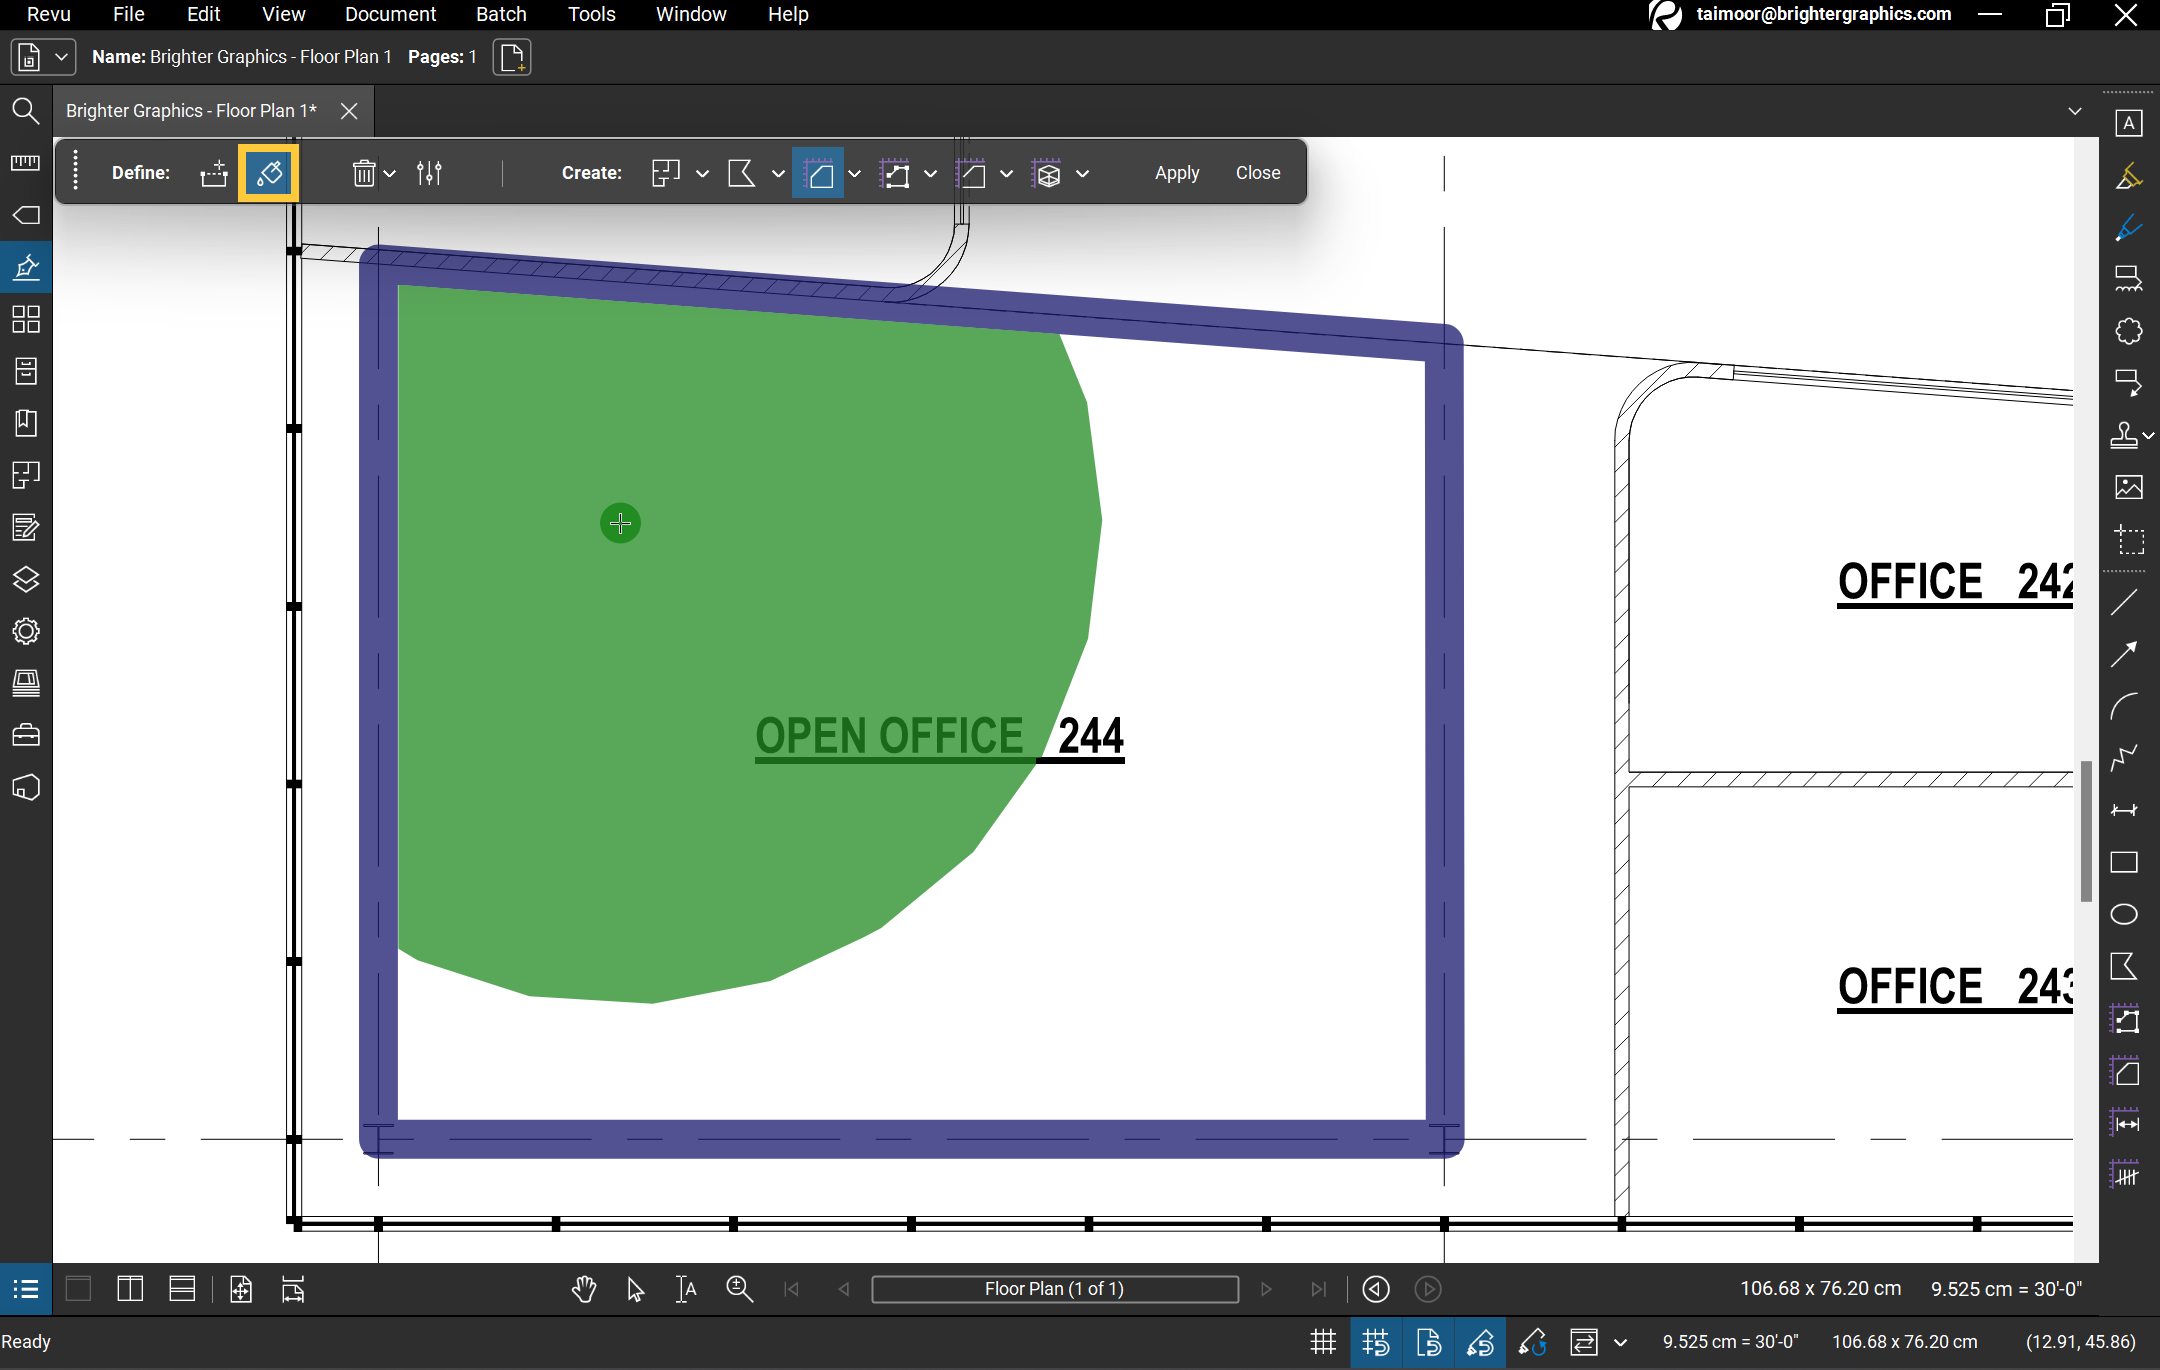
Once your Fill is completed you can choose which markup or measurement to apply. You can apply a Space (with measurement), Polygon markup, Area measurement, Poly-length measurement, Perimeter measurement, Volume measurement, or any combination of these.
Measurements with Dynamic Fill
– For instance, click on Area measurement and click the “Apply” button (Make sure the markup(s) you want to create is/are highlighted in the Dynamic Fill toolbar).
Note: You can click on the down arrow alongside each markup or measurement tool to set custom properties.
Similarly, you can apply other measurements separately or together like Volume, Poly-Length, and Perimeter.
– Use the Select tool to select your markup or measurement and adjust it to the desired corners.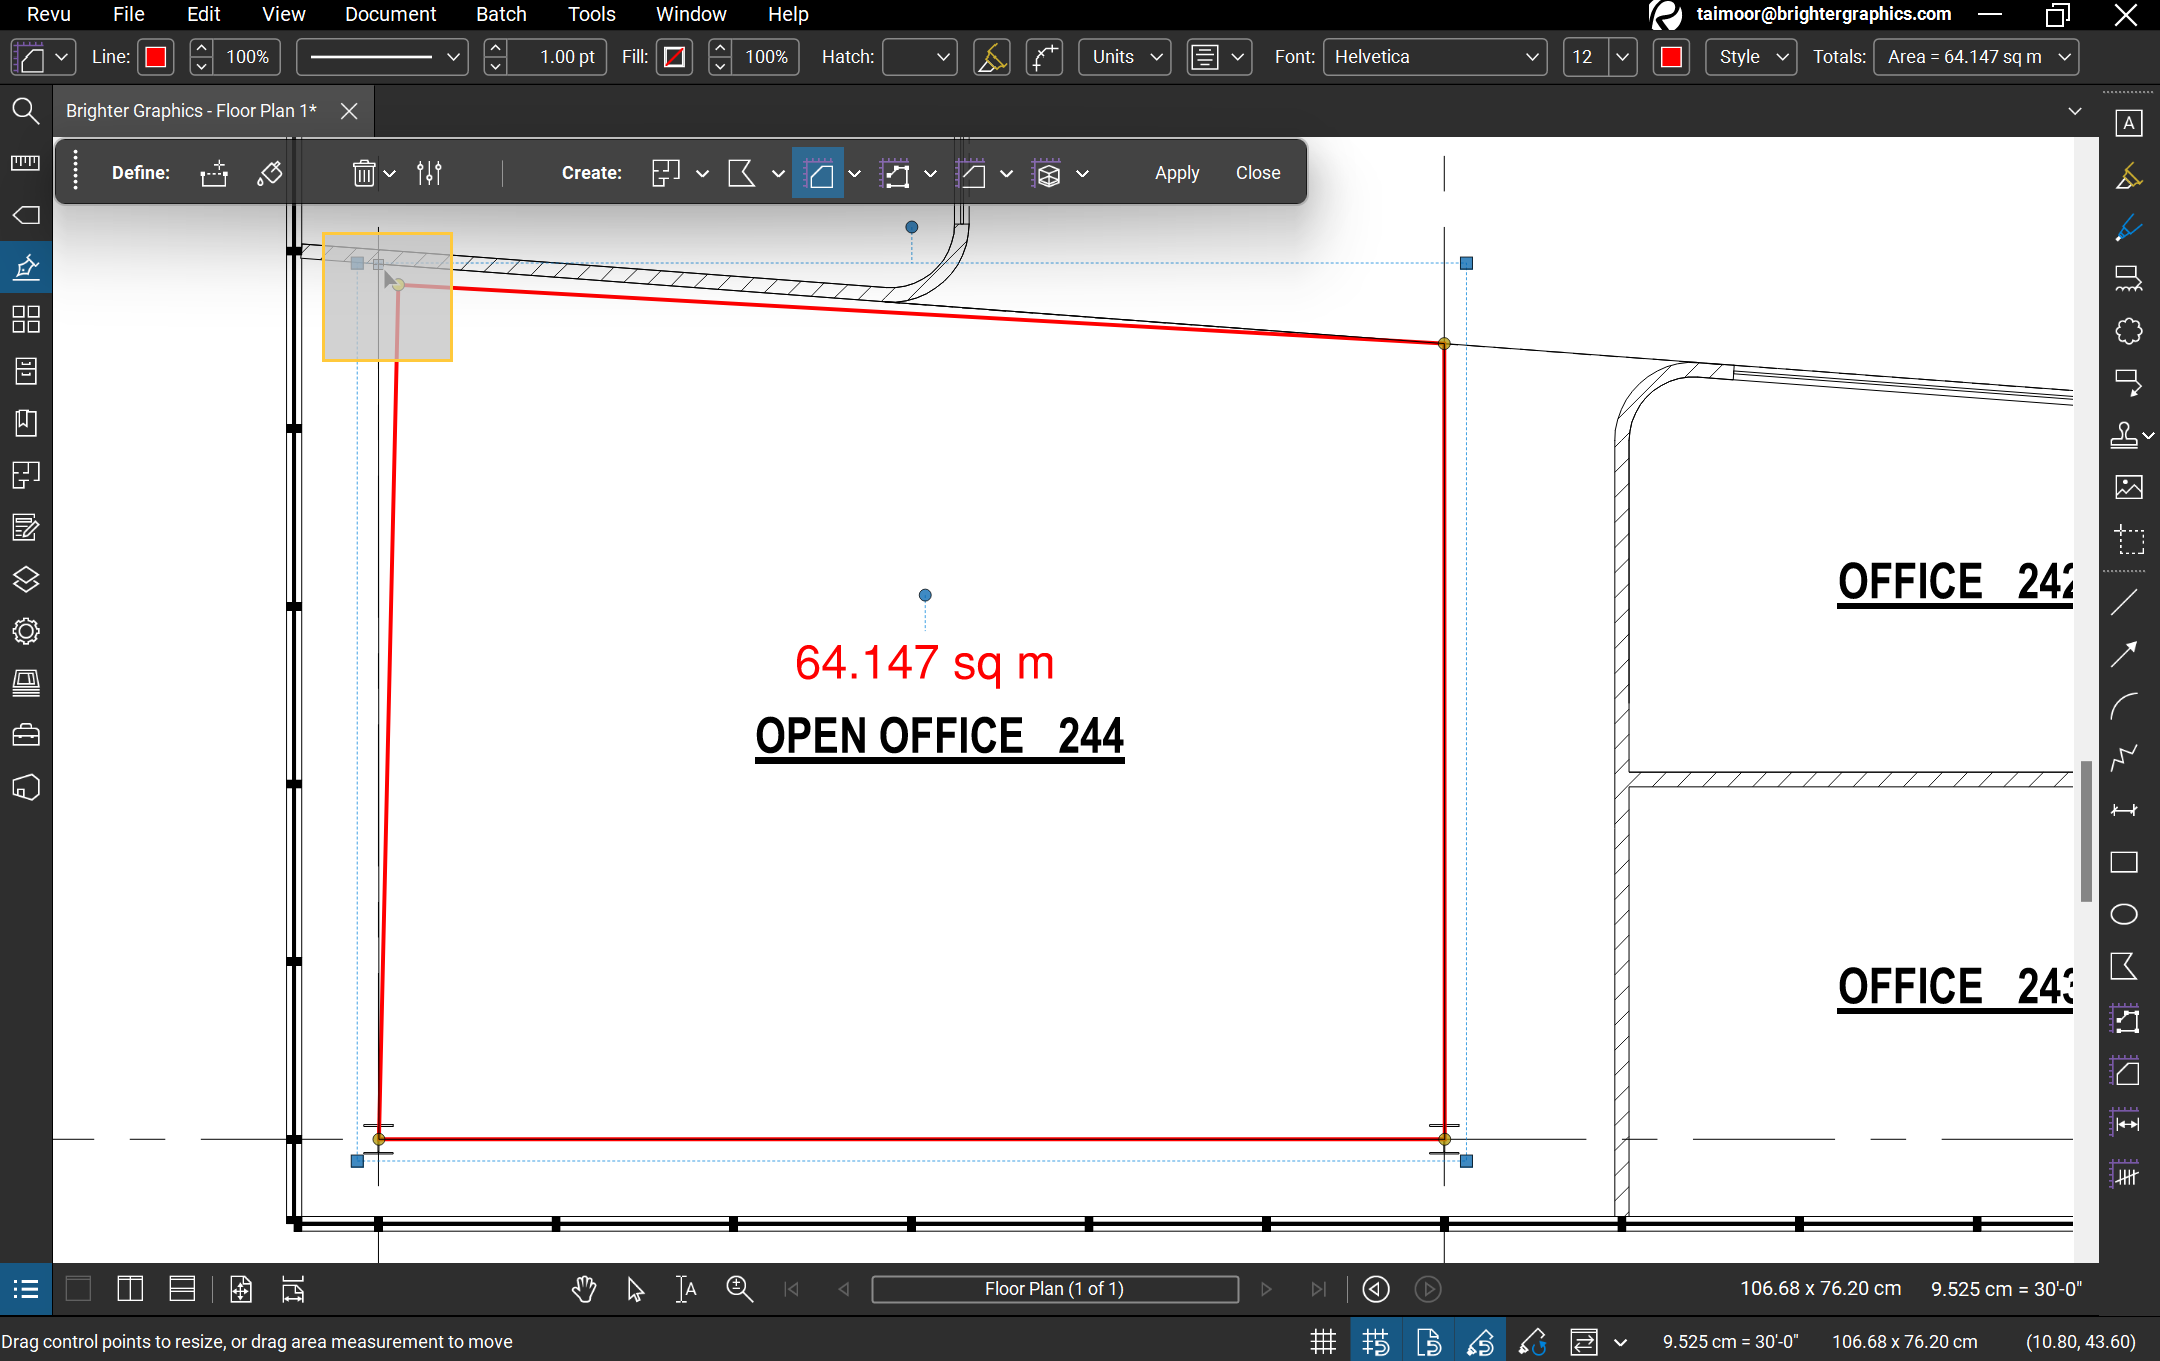
– To edit your Area, go to the Measurements panel and set your Area Measurement Properties (for instance, set Label to Open Office 244 – Area and Area Unit to Sf).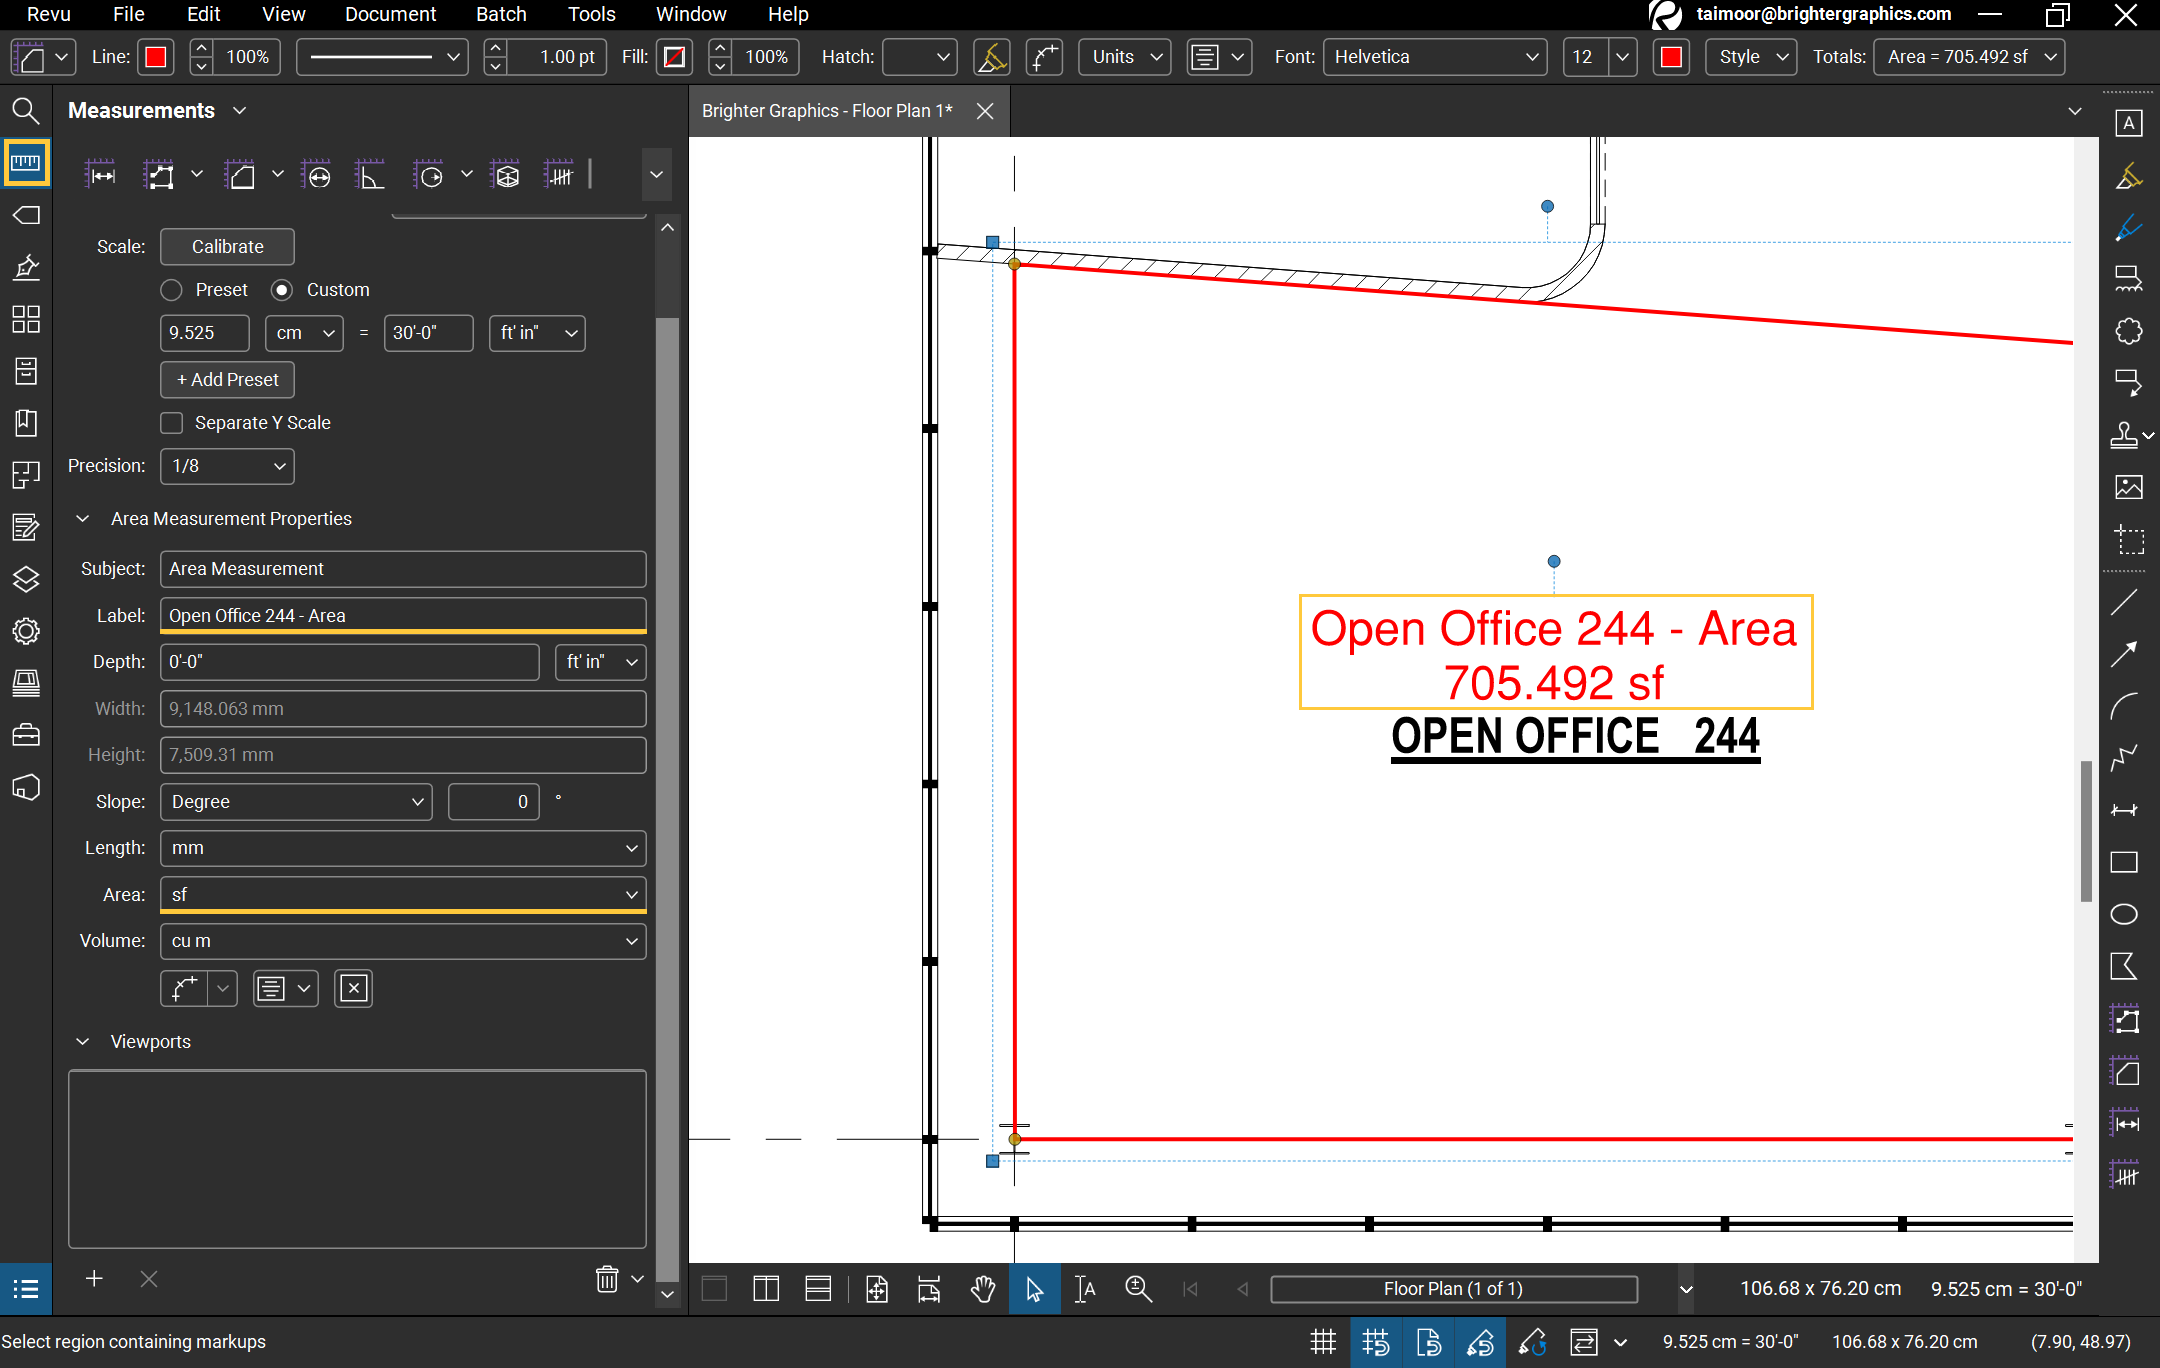
Spaces with Dynamic Fill
– To apply Spaces, perform the same routine again but select the “Spaces” option along with your desired markup(s) or measurement(s) like Area to create Space. You can also Name and assign Layer Numbers to your spaces by clicking on the downward arrow on the right of the Spaces icon.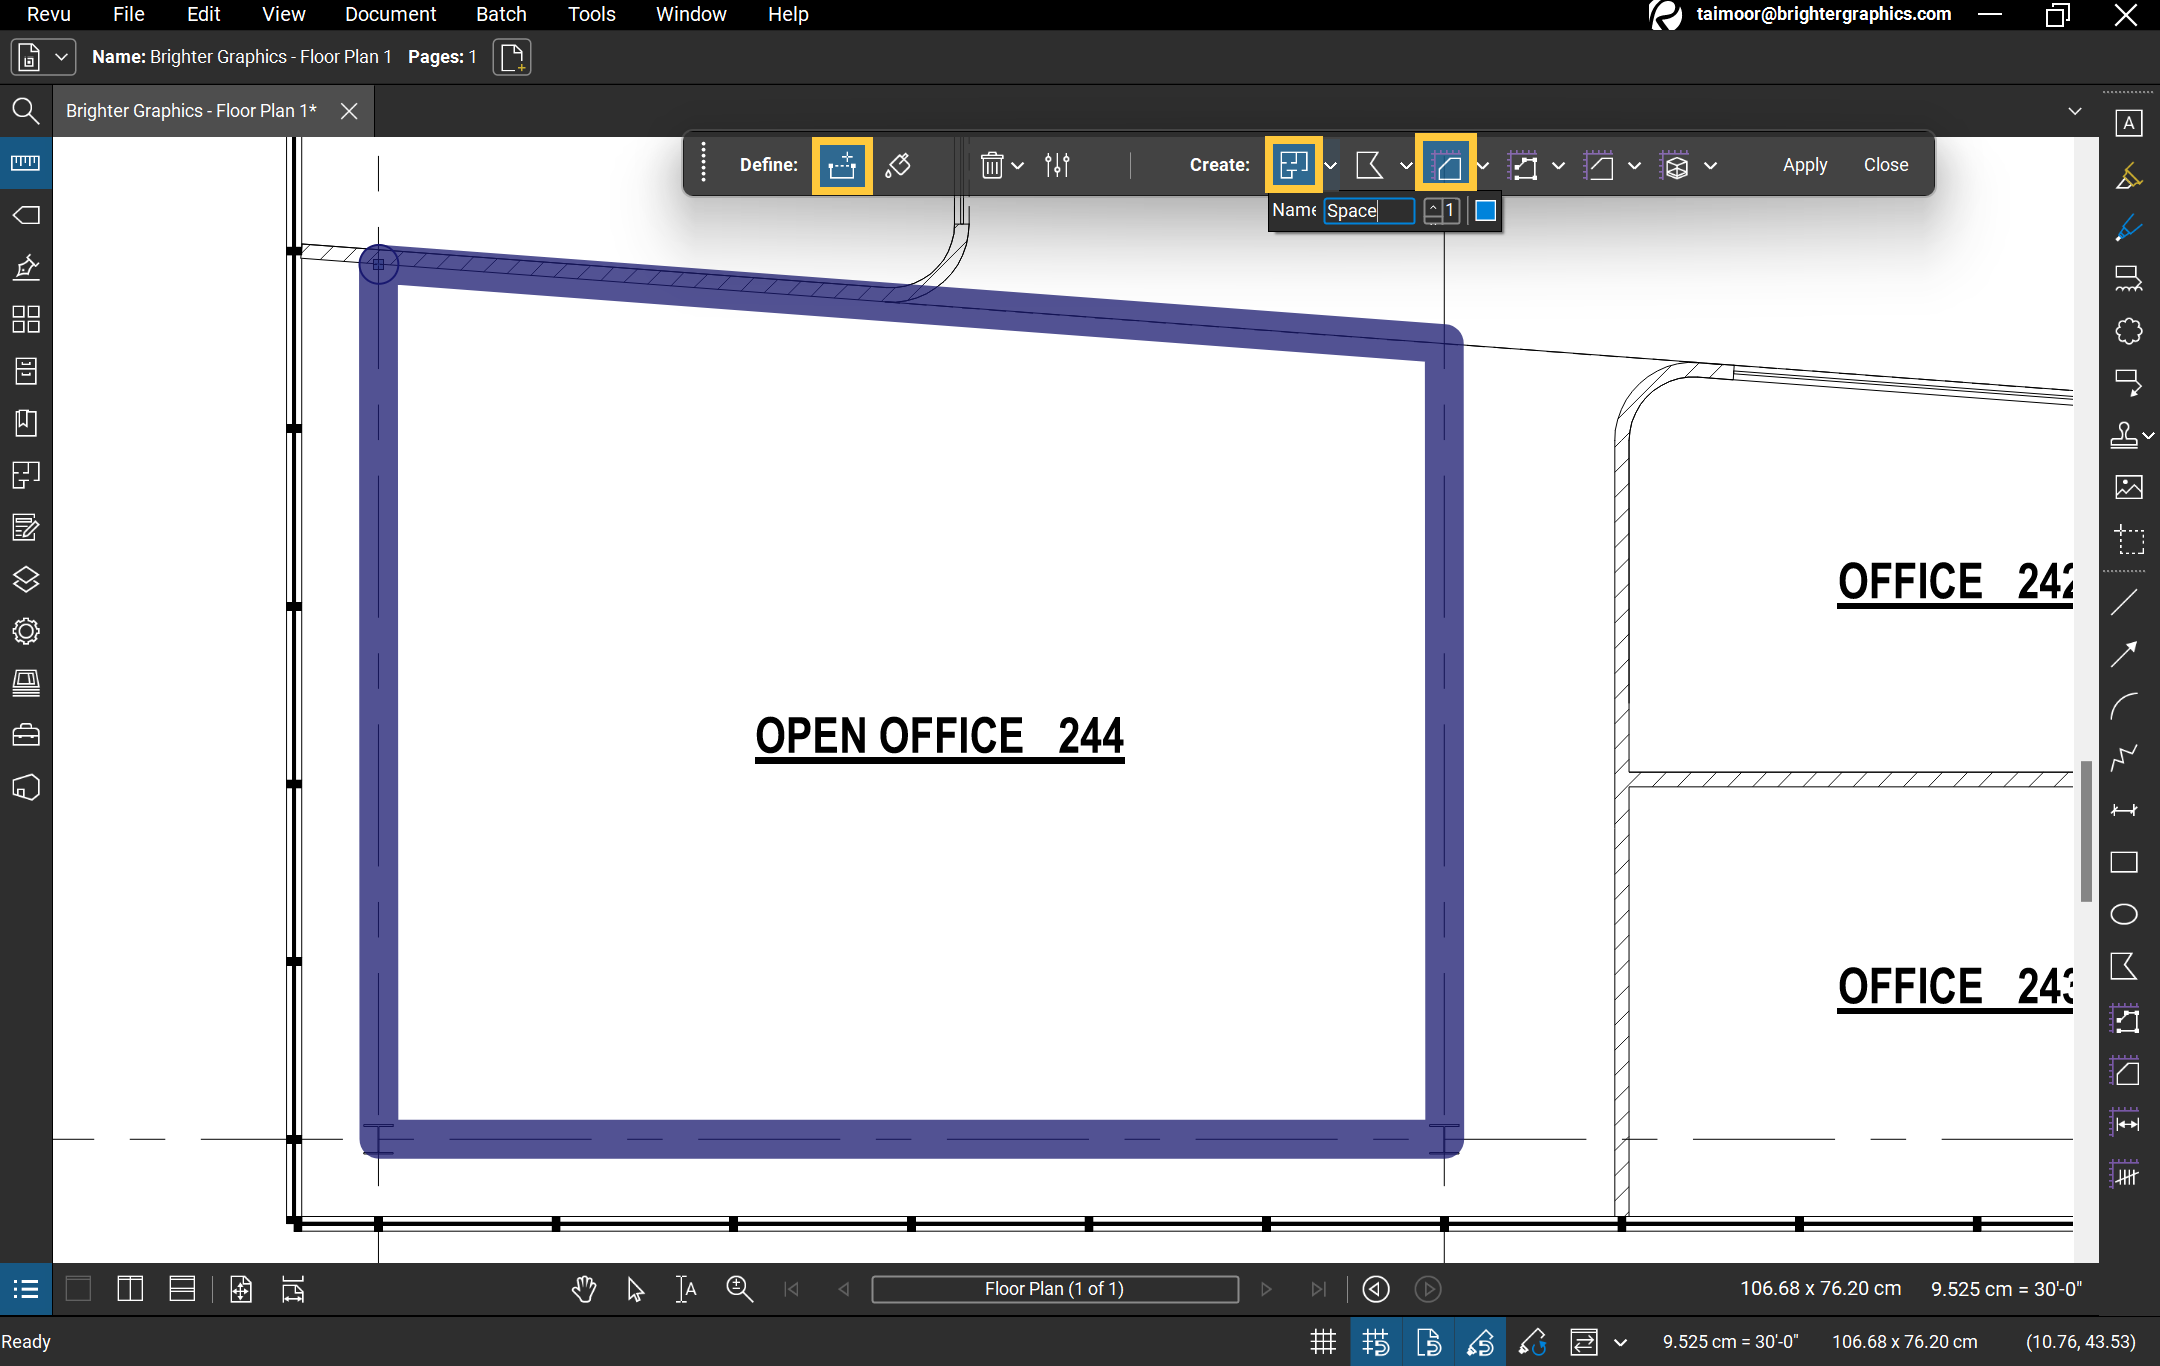
Your space will be created that you can check by clicking on the Spaces panel. You can also turn the Space layer ON or OFF to turn your space appear or disappear, go to the Markups List > Layer Column and click the eye icon to toggle between ON & OFF options.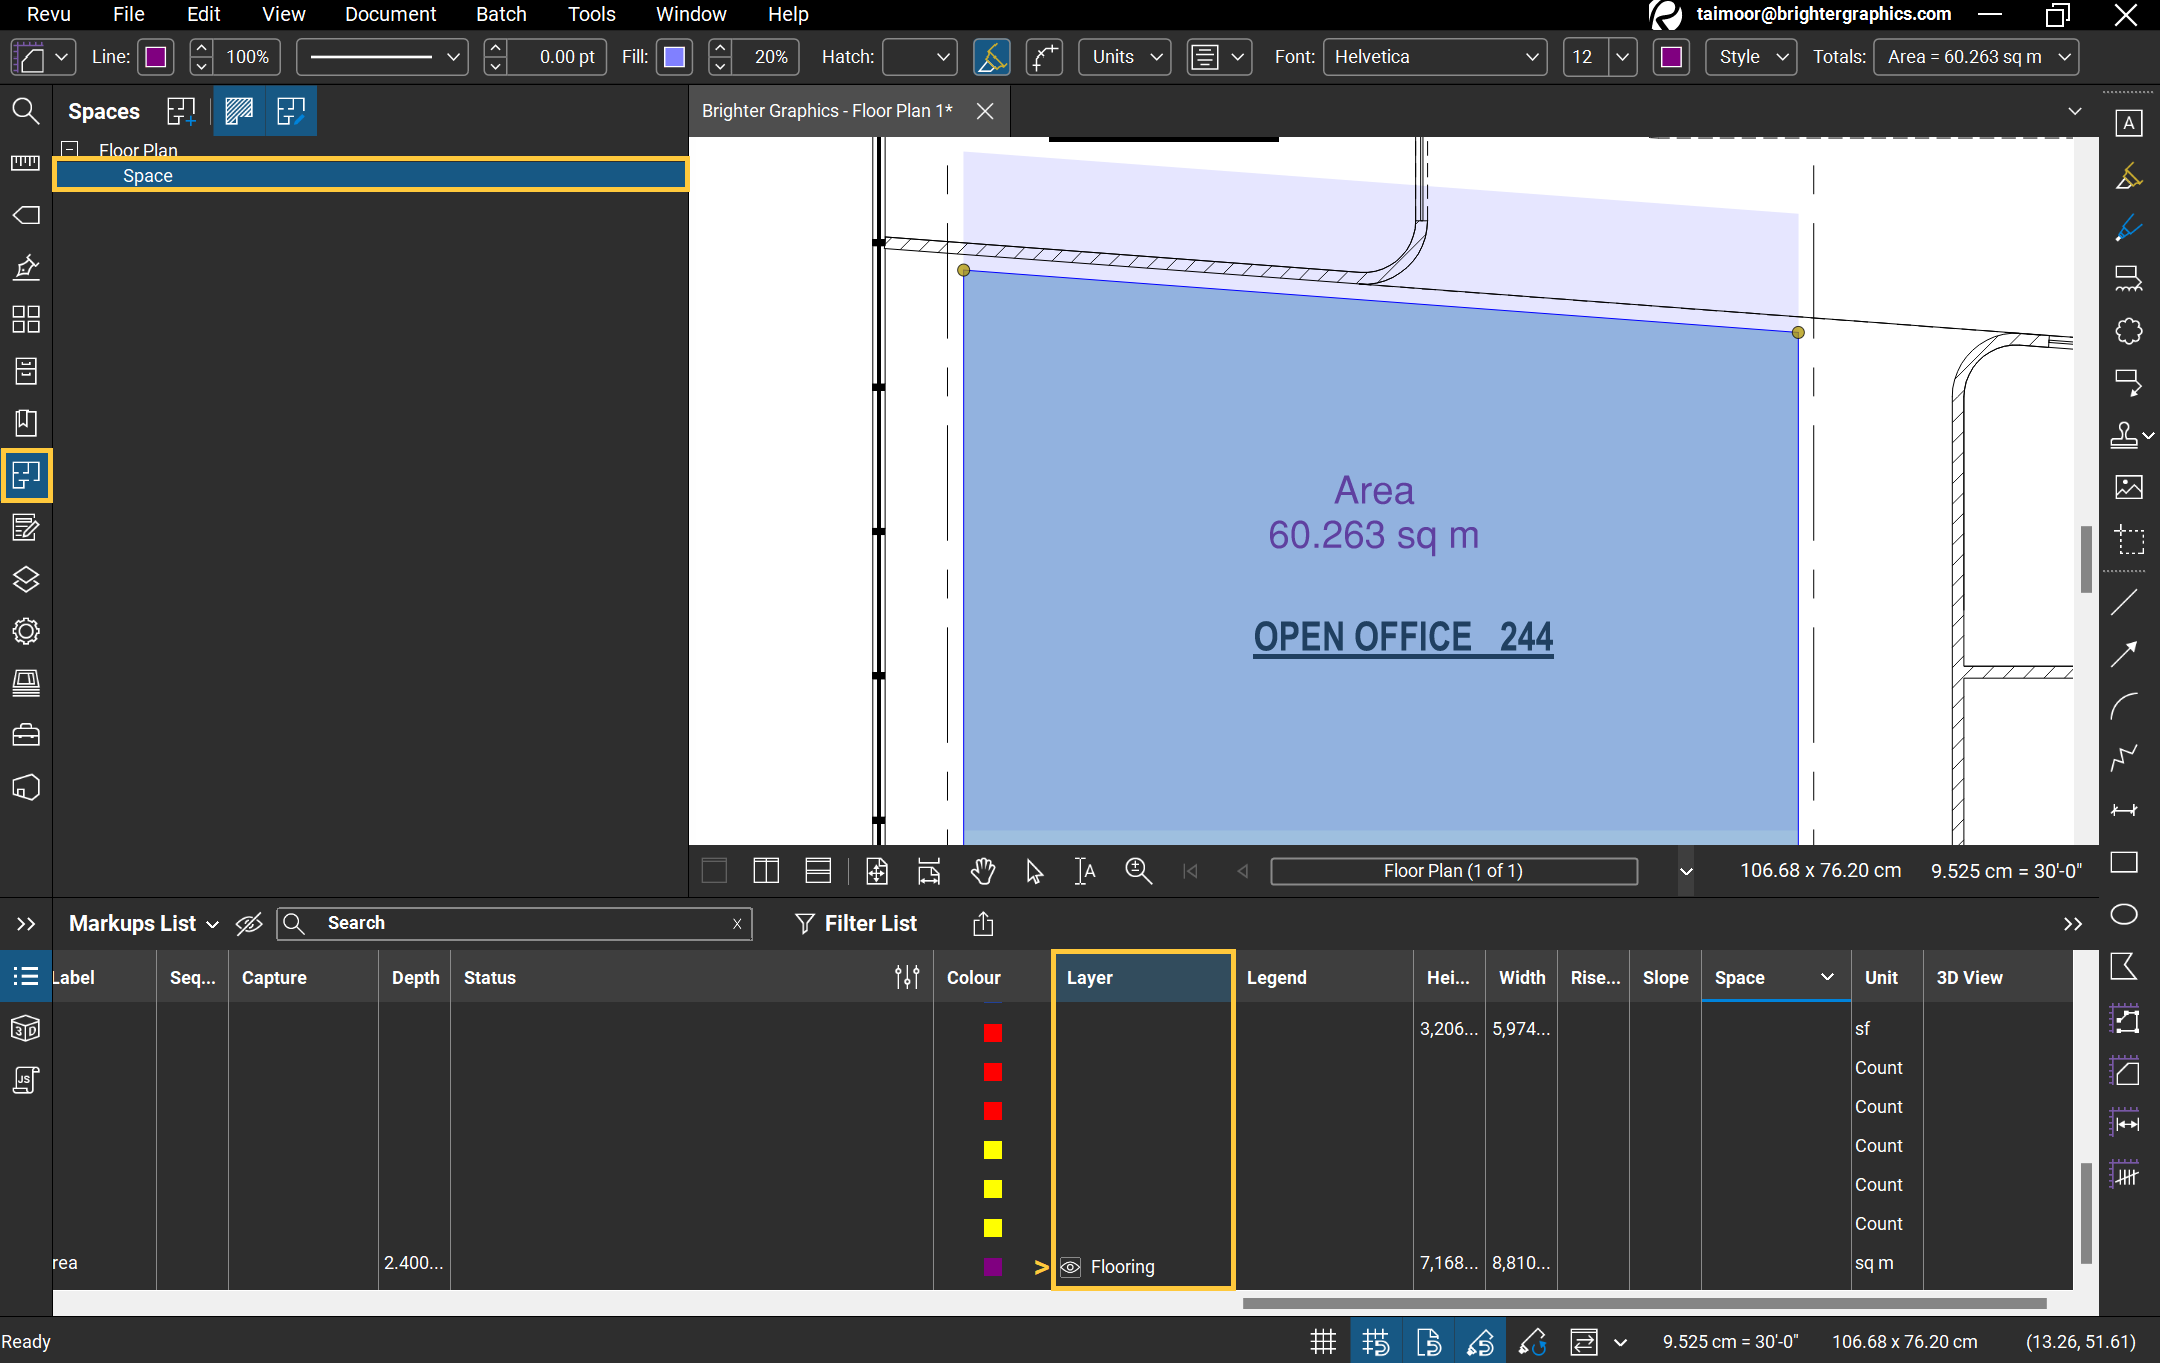
Alternate Access Route
You also access Dynamic Fill from the Measurements panel or using its shortcut key, “J”.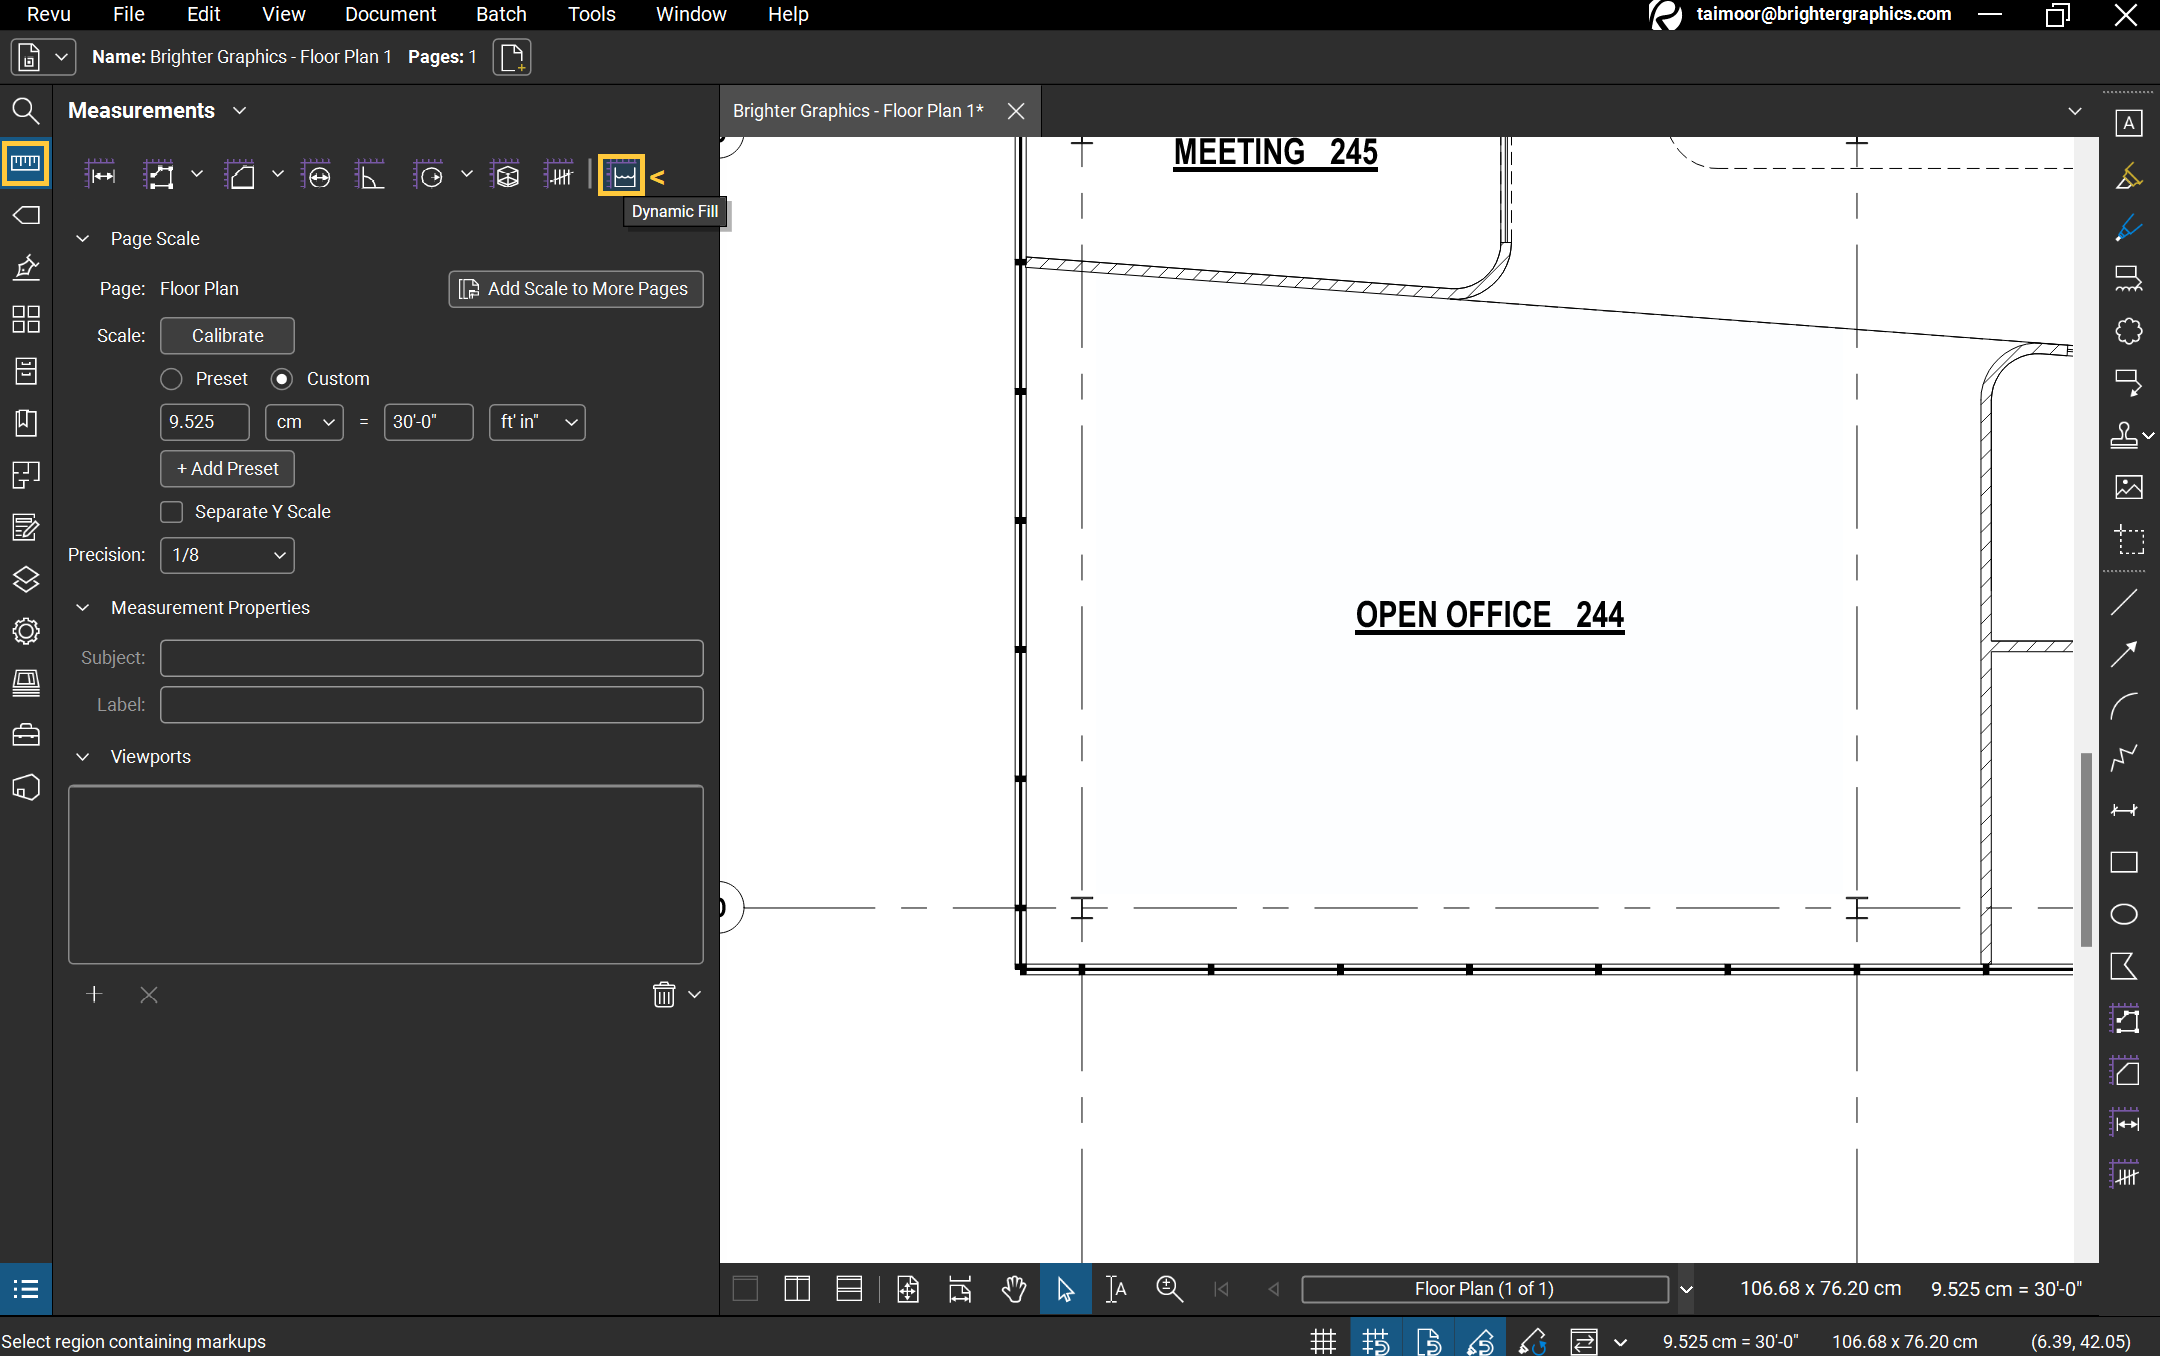
With Dynamic Fill available at your disposal, there is no point in wasting your valuable time painstakingly selecting every point and curve of an irregular shape. Let Dynamic Fill in Bluebeam Revu 21 do the heavy lifting for you and get your markups and measurements done in a fraction of the time.
Stay connected with Brighter Graphics. We are the largest reseller of Bluebeam in the UK and Europe and your go-to partner for all things Bluebeam.


