How to Highlight Objects Using the Snapshot Tool in Bluebeam Revu
To highlight objects using the snapshot tool in Bluebeam Revu.
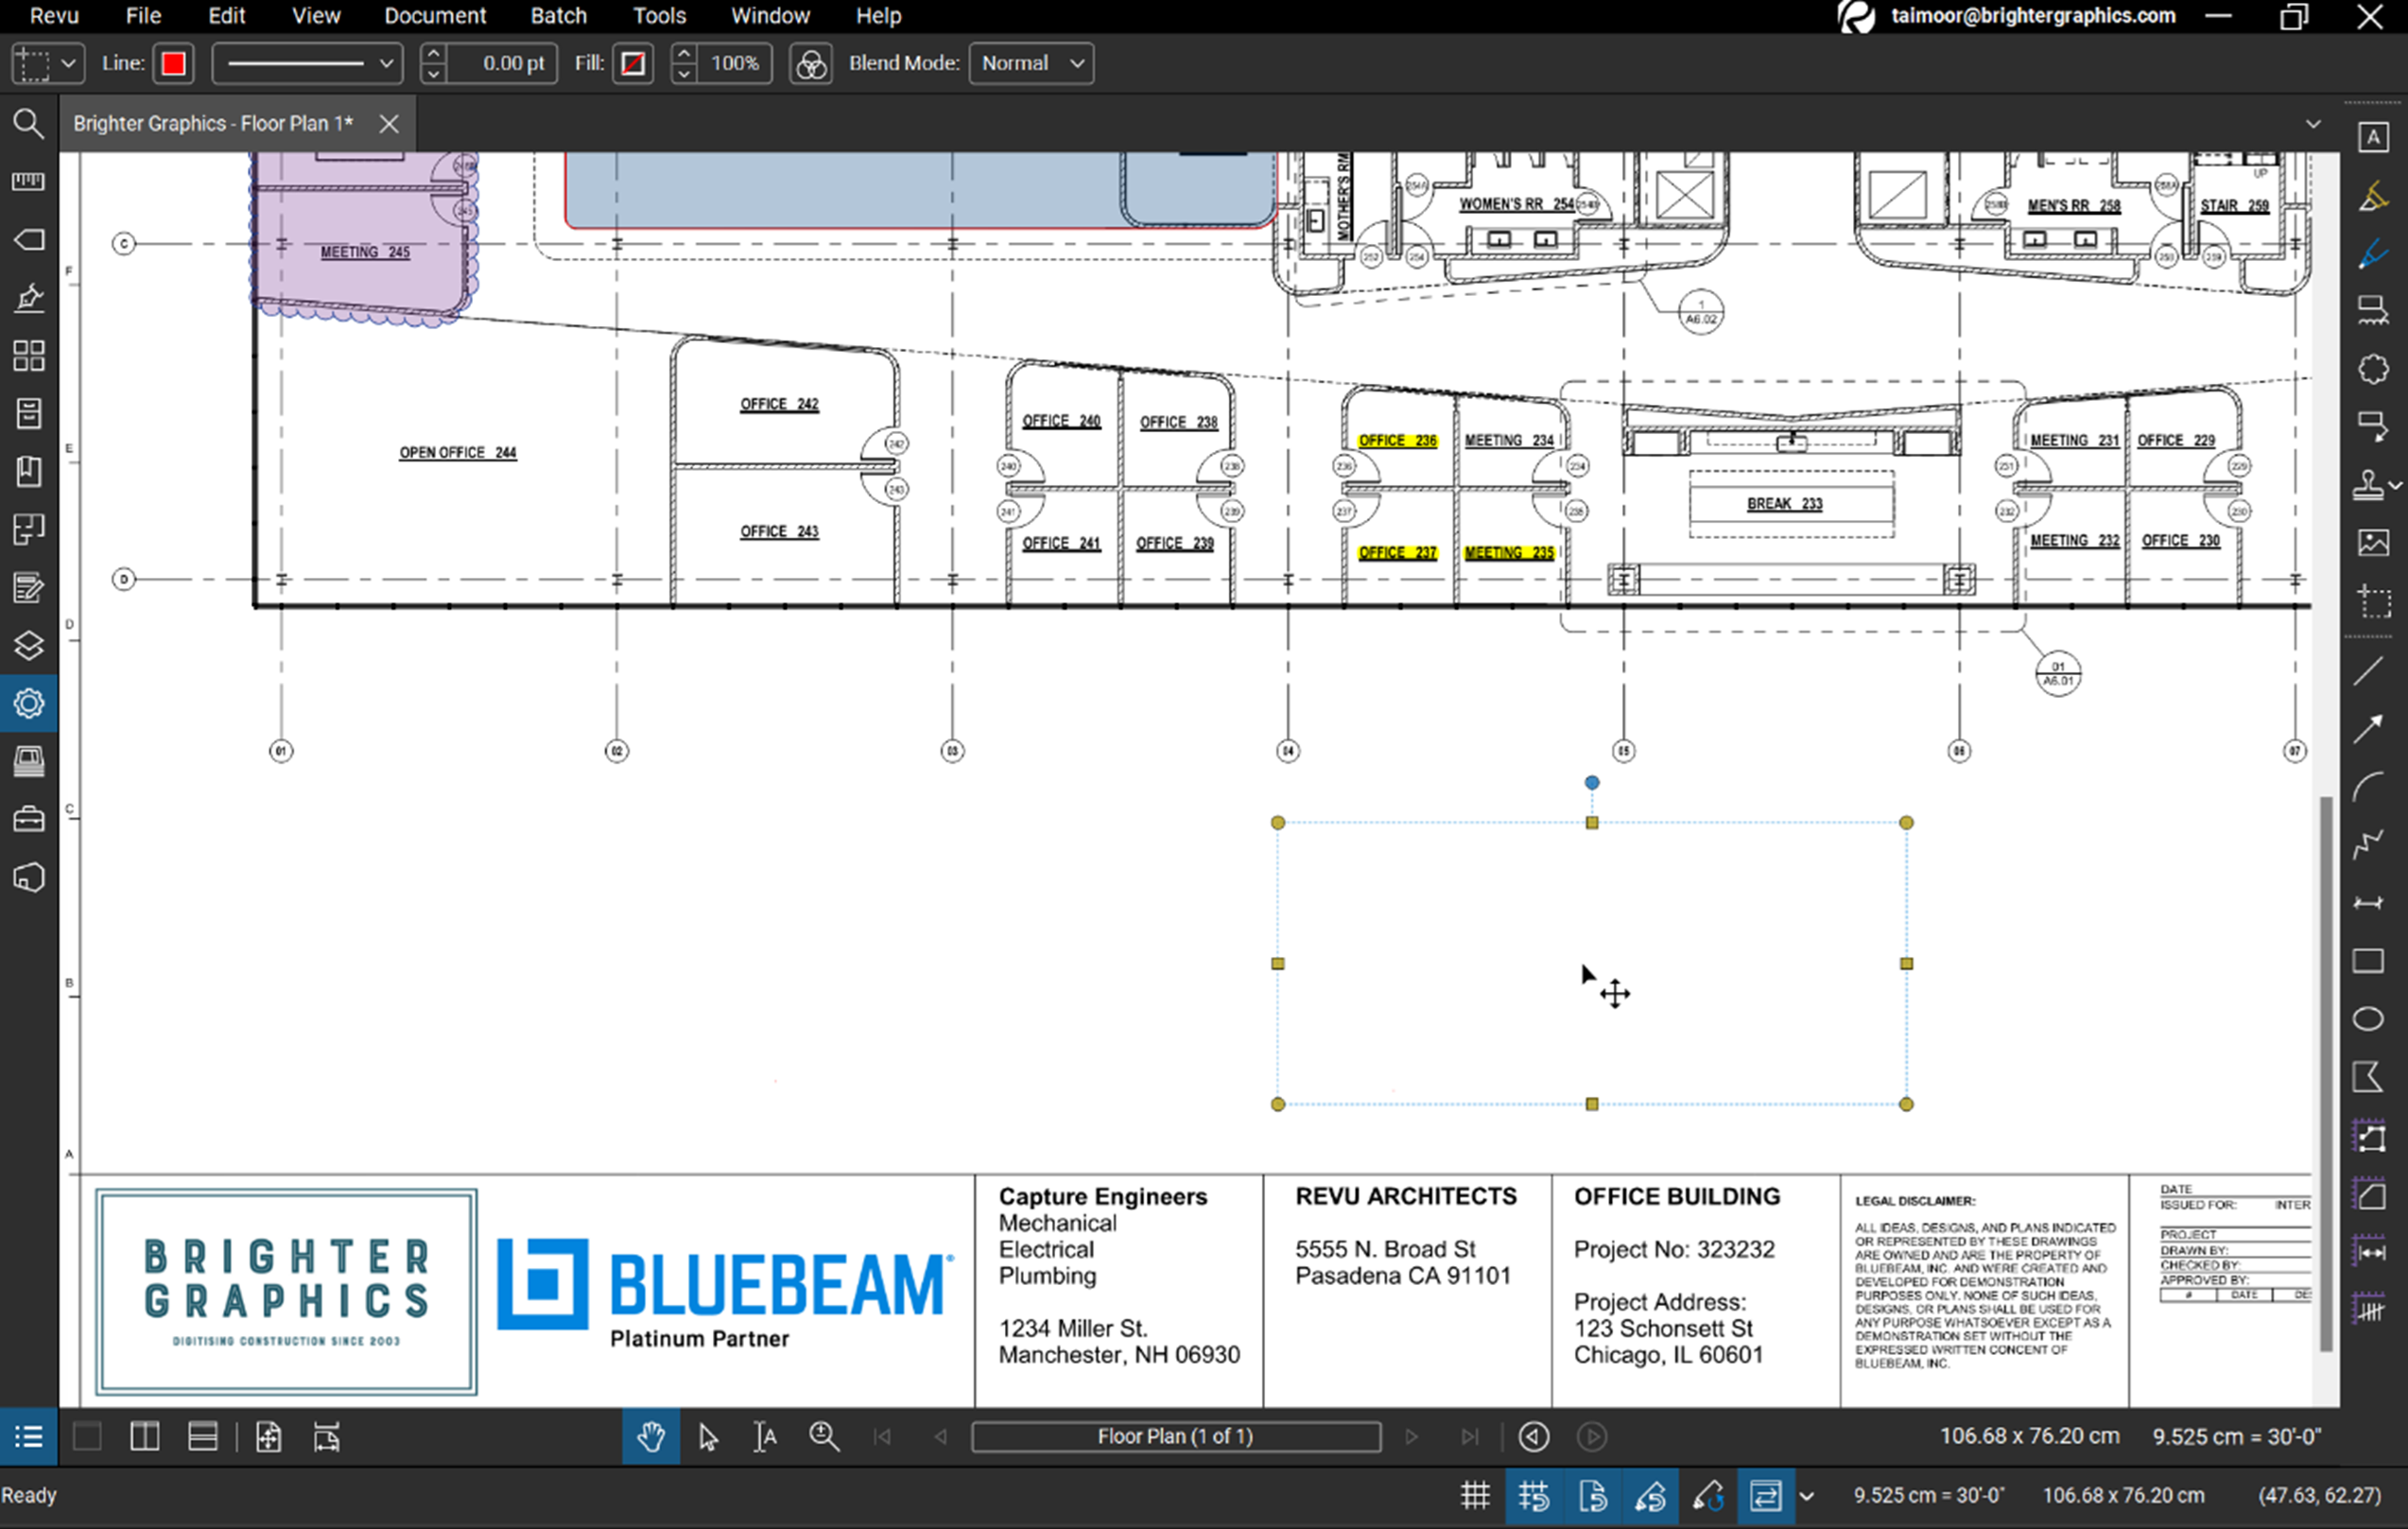
Step 1 – Select the Snapshot tool from the toolbar and select a white region to take a snapshot.
Step 2 – Once you drag-and-release your selection, Right-click > Paste or hold CTRL+V to paste your snapshot.
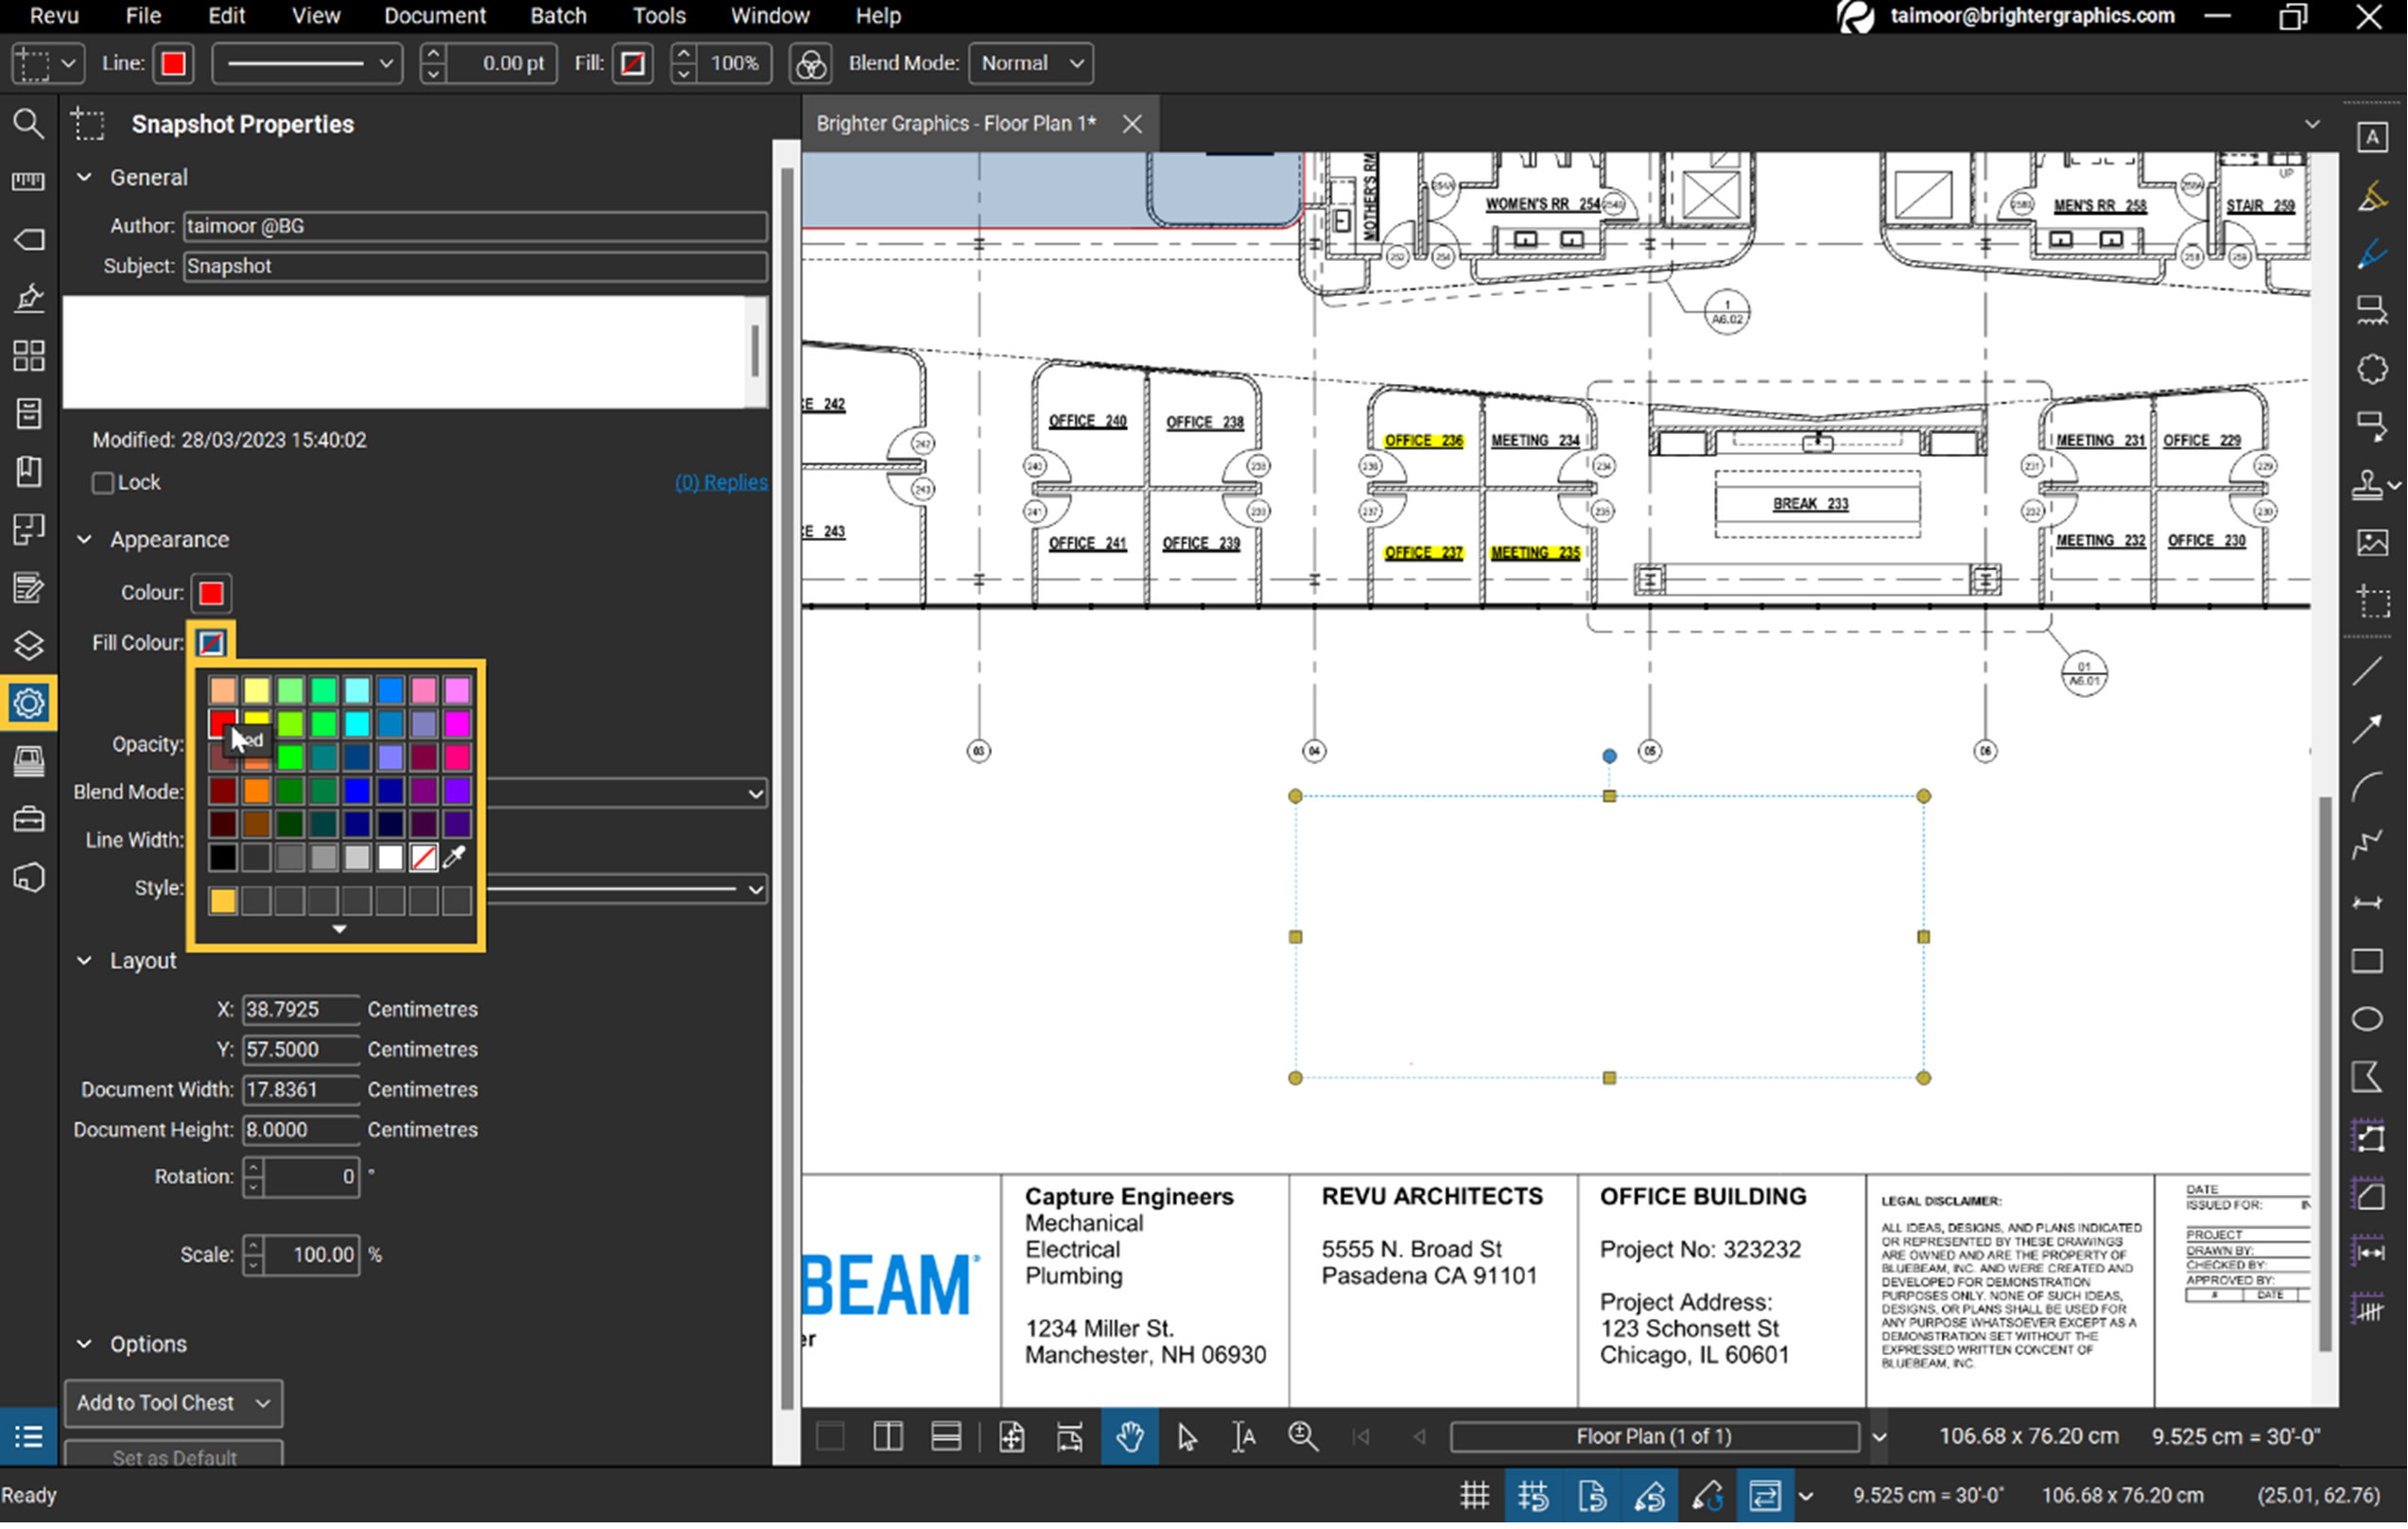
Step 3 – Now select your snapshot, go to the Properties panel, and set the Fill Colour of your choice.
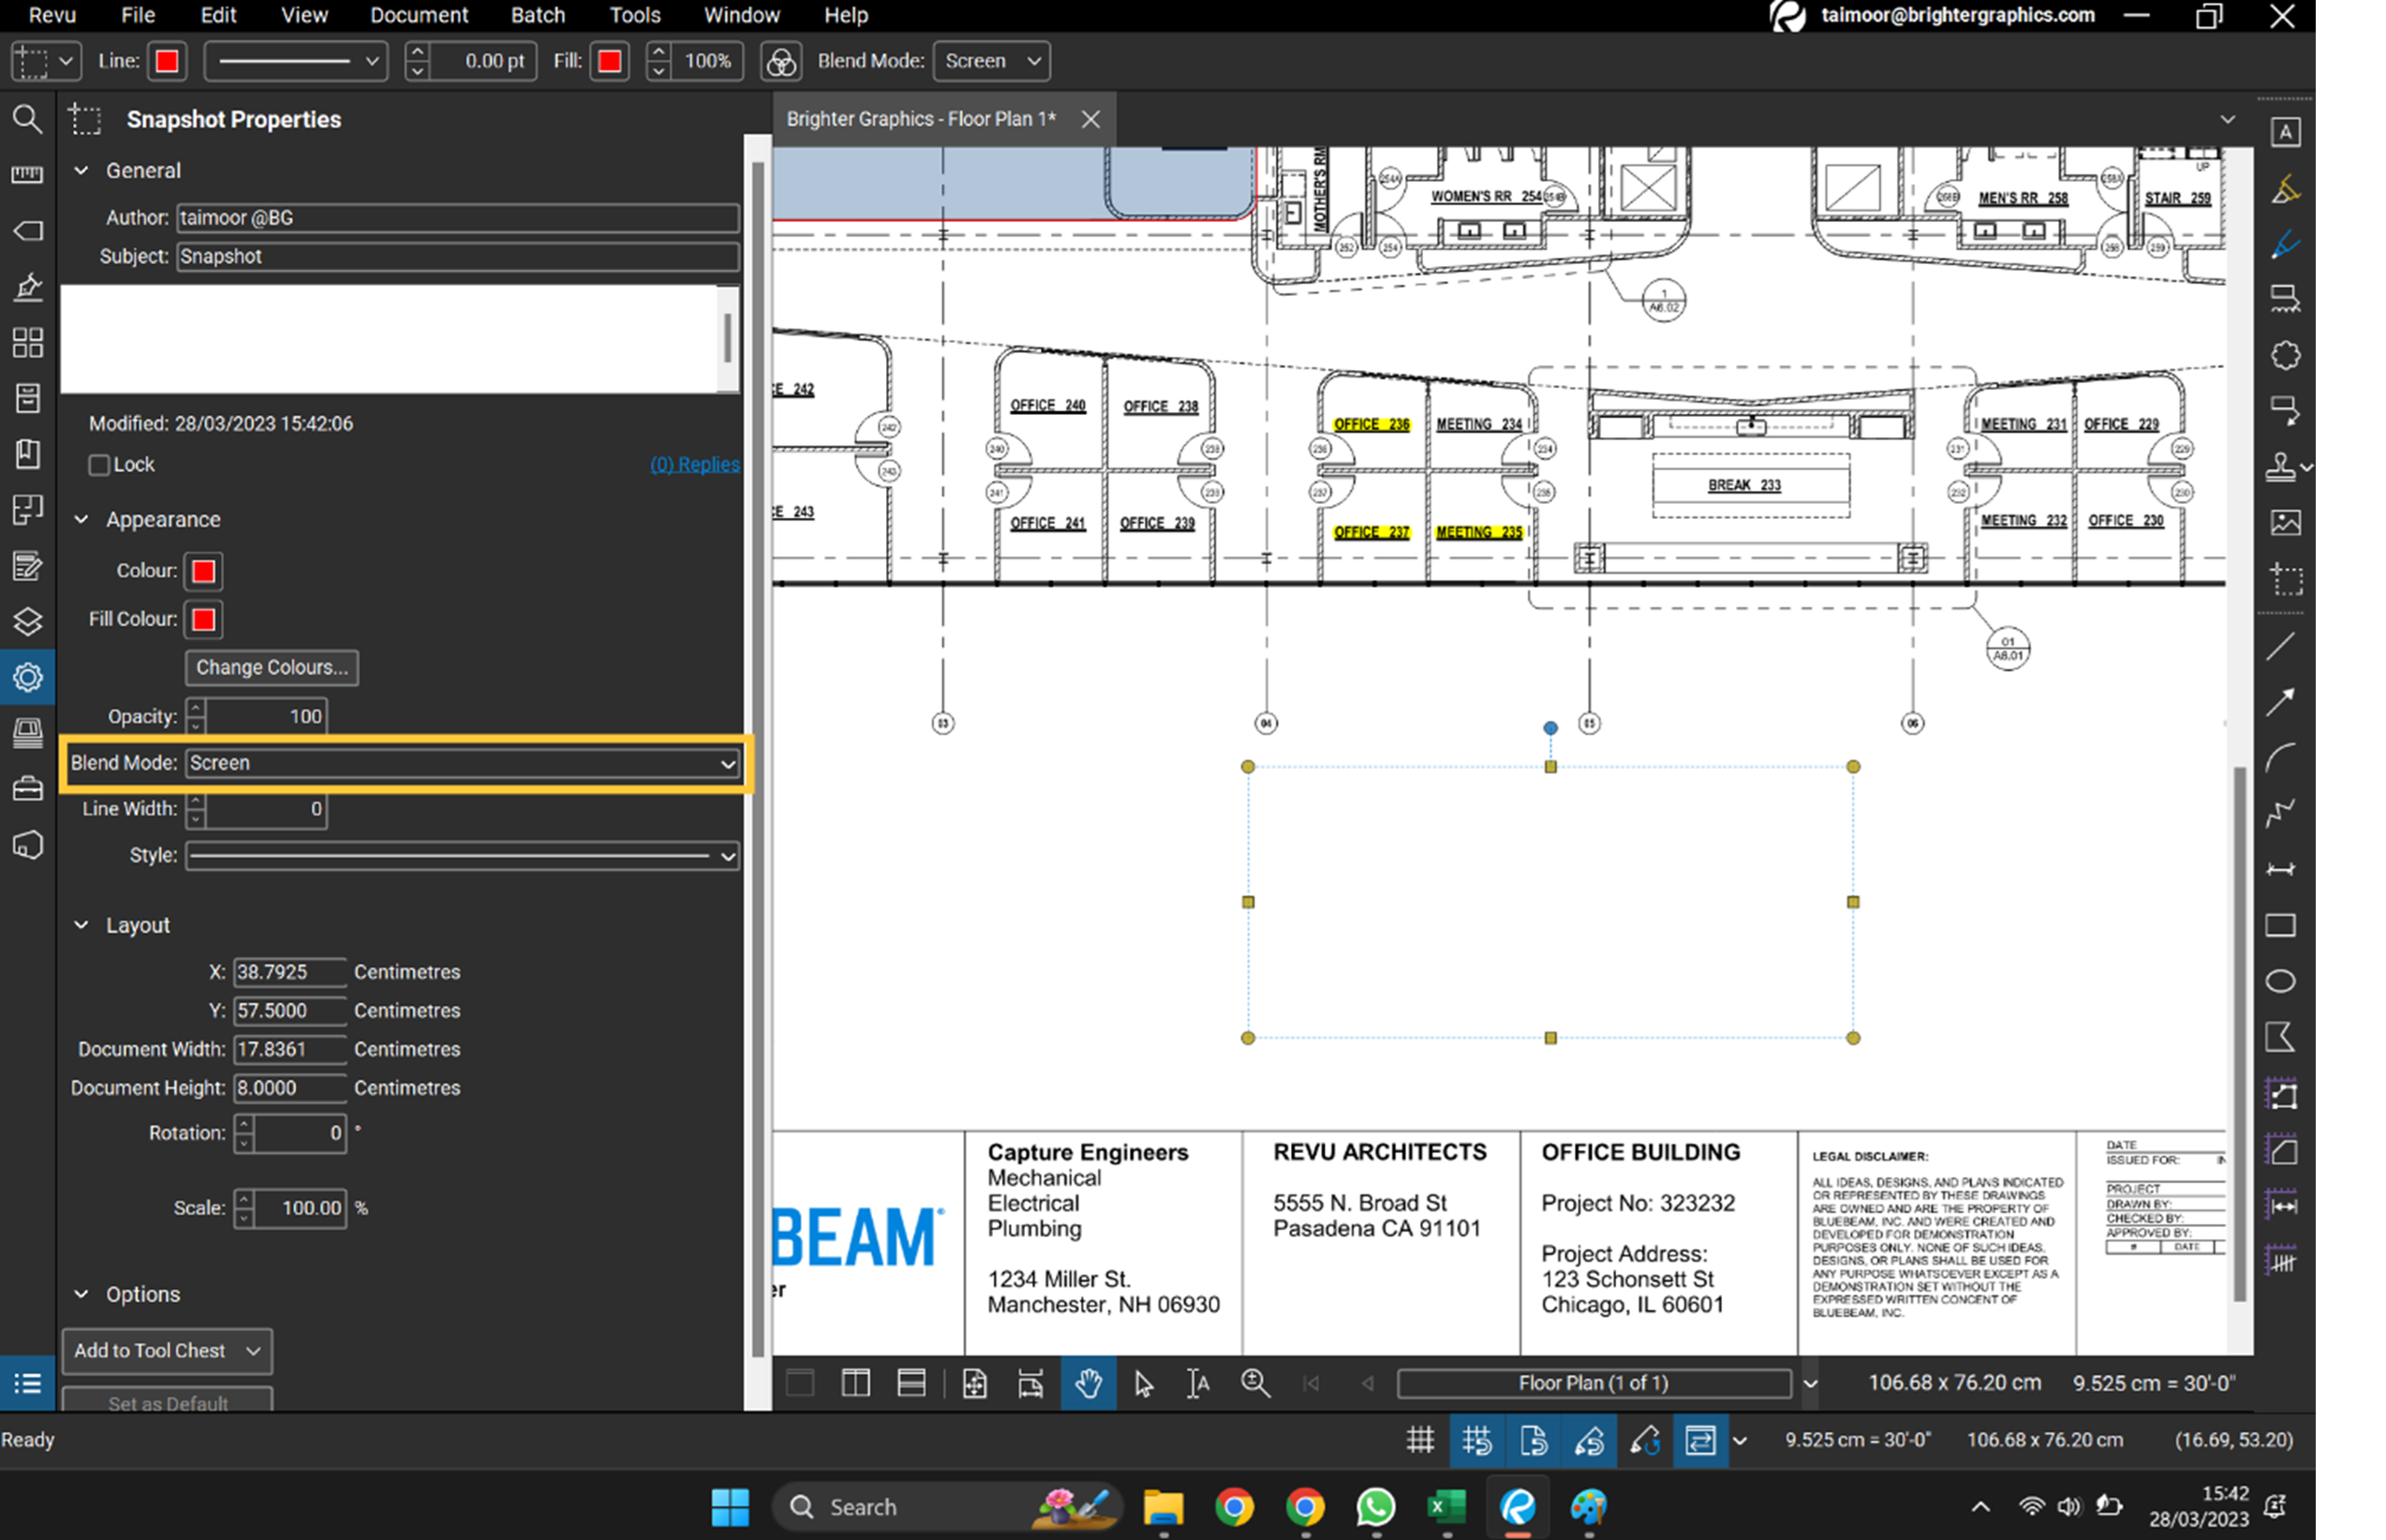
Step 4 – Set Blend Mode to Screen.
Step 5 – Now drag the snap image with the Select tool and hover it over your content. The content under the snap image will turn to the colour you choose as your snap image’s fill colour.
You can resize your custom markup and adjust it accordingly to match your requirements.
Learn more about how to make custom markups in Bluebeam Revu.
Exceptional Partner Support
Brighter Graphics is the Sapphire Partner of Bluebeam Revu, offering comprehensive support for all things related to Bluebeam. Whether it’s onboarding or technical support, Brighter Graphics is your go-to platform with an extensive library of resources, how-to guides, video tutorials, and training. Explore our Resource Center to make your journey with Bluebeam in AEC seamless.
Experience the Bluebeam Difference
Join the thousands of professionals who have transformed their project management experience with Bluebeam. Bluebeam allows you to easily navigate your projects, collaborate efficiently, and confidently make impactful, data-driven decisions.


