How to Flatten Markups in Bluebeam Revu
Bluebeam Installation Guide
Flattening markups in Bluebeam Revu is the process of making your markups permanent, removing any editing ability to that markup, or set of markups. It is a crucial step in the PDF workflow, especially in industries like construction, engineering, and architecture, where plans and designs need to be shared with clients and contractors.
In this guide, we will show you how to flatten markups in Revu 21, giving you peace of mind that your hard work will not be undone by an accidental keystroke or malicious edit. Let's get started.
Flattening Individual Markups
To flatten an individual markup:
Step 1 – Select any markup on the drawing. For instance, we are using a simple cloud markup.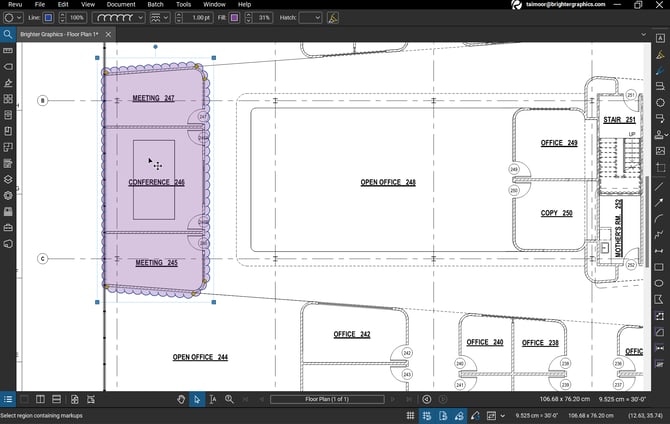
Step 2 – Right-click on the markup and select “Flatten”.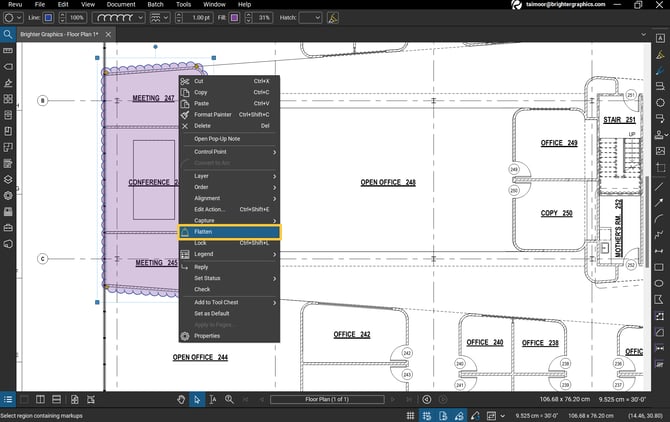
Now the markup is part of the document, and it cannot be edited.
Flattening an Entire Document
To flatten an entire document.
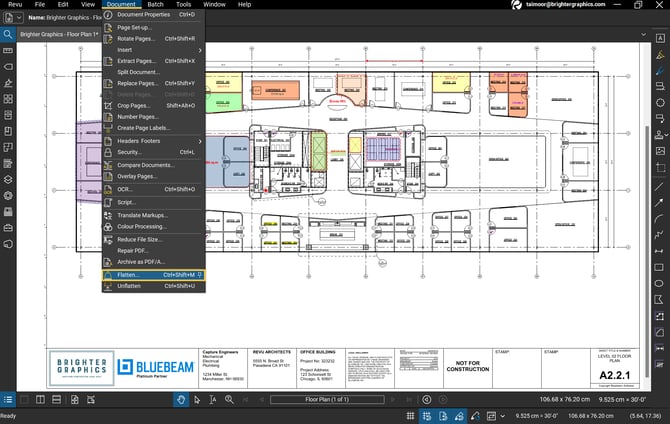
Step 1 – Go to the Document tab in the menu bar > Click “Flatten.”
The Flatten Markups dialogue box will appear like the one below.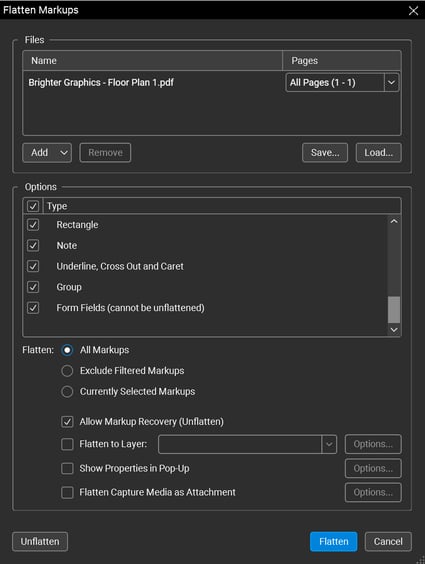
- Under the Files section, the file you are working on currently appears automatically.
- From the Pages dropdown menu at the right of the file's name, you can select the page or range of pages you want to flatten.
- You can Add additional files to flatten by using the Add. You can choose multiple files and folders.
- If you need to remove any of these files, select the file and click the Remove
- You also have the option to Save and Load file groups on the right side.
- Under the options section, you can check or uncheck your desired markup types to opt or omit them from flattening.
- Now you can also choose which markups to flatten.
- All Markups - to flattens all markups.
- Excluding Filtered Markups - to exclude any filtered markups from the Markups list,
- Currently Selected Markups - to only flatten markups selected before opening the Flatten Markups menu.
- The Allow Markup Recovery (Unflatten) option is selected by default. It allows anyone to unflatten the markups.
Step 2 – After opting for your preferred settings, click on the “Flatten” button below. Once your markup(s) will be flattened they cease to appear in the Markups List.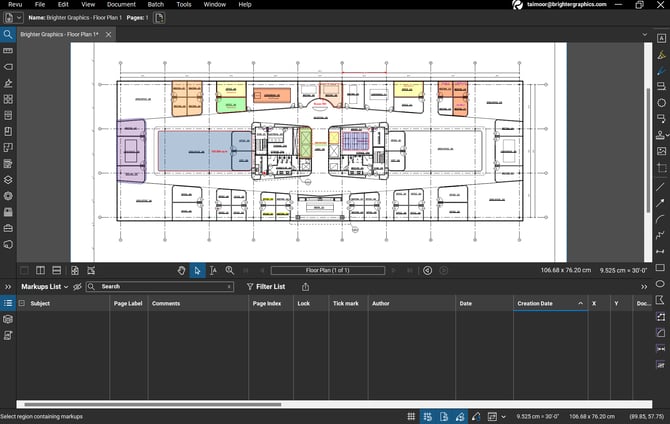
If markups recovery is allowed, you can unflatten your document by going to Document menu and clicking the “Unflatten” option.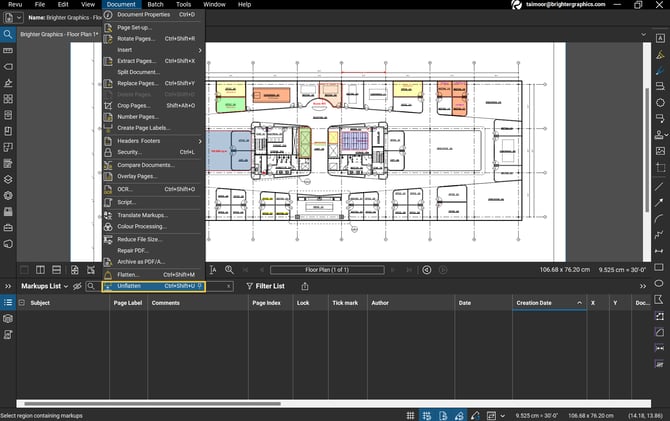
The Flattening action will be rolled back as you will start seeing your markups appeared in your markups list and become editable again.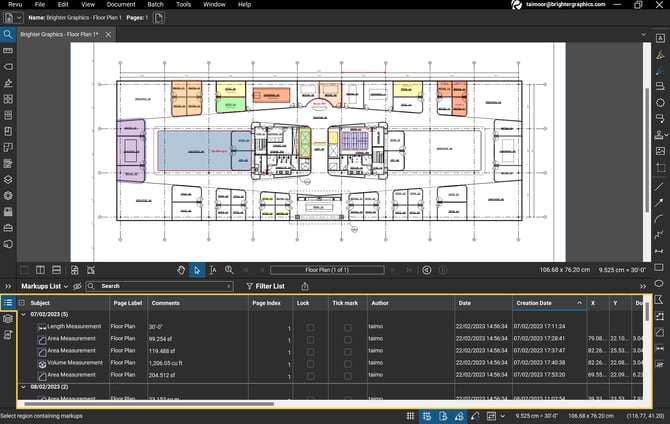
Exceptional Partner Support
Brighter Graphics is the Sapphire Partner of Bluebeam Revu, offering comprehensive support for all things related to Bluebeam. Whether it’s onboarding or technical support, Brighter Graphics is your go-to platform with an extensive library of resources, how-to guides, video tutorials, and training. Explore our Resource Center to make your journey with Bluebeam in AEC seamless.
Experience the Bluebeam Difference
Join the thousands of professionals who have transformed their project management experience with Bluebeam. Bluebeam allows you to easily navigate your projects, collaborate efficiently, and confidently make impactful, data-driven decisions.


